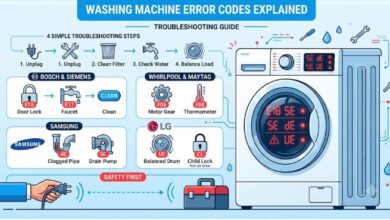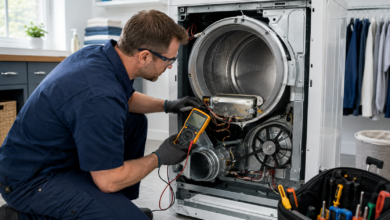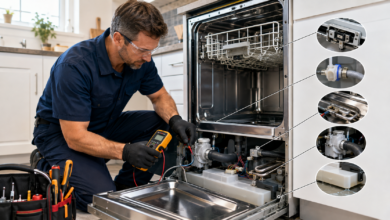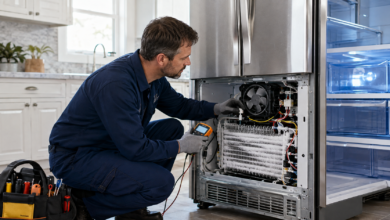
Quick answer: Vacuum cleaner error codes explained cover five main fault categories — blockage errors (clogged filter, hose, or brush roll), overheating errors (thermal cutoff triggered by restricted airflow), sensor errors (dirty cliff or obstacle sensors on robot vacuums), battery errors (degraded or non-charging battery on cordless models), and brush roll errors (jam or motor failure). Most vacuum errors are resolved by cleaning — filter, brush roll, and sensor maintenance resolves the majority of faults without any parts replacement.
“Error 2” — The Robot Vacuum That Refused to Leave the Dock
My robot vacuum started displaying “Error 2” and returning to its dock within seconds of starting a cleaning cycle. It would spin in place briefly, then retreat. I assumed it had a serious navigation problem. After looking up the error code for my specific model, I discovered that Error 2 on my robot vacuum indicated a cliff sensor fault — the sensors that prevent the robot from falling down stairs were reading the floor as a drop-off.
The fix took 30 seconds: I wiped the four cliff sensor windows on the underside of the robot with a dry microfiber cloth. The sensors had accumulated a thin layer of dust that was causing them to misread the floor surface. The robot completed a full cleaning cycle without issue. This vacuum cleaner error codes explained guide covers the errors that actually matter — and why cleaning is almost always the right first step.
How Vacuum Cleaner Error Codes Work
Modern vacuum cleaners — particularly robot vacuums and cordless stick vacuums — use electronic control boards that monitor airflow, motor temperature, brush roll operation, battery status, and sensor inputs. When a parameter falls outside the expected range, the control board displays an error code, triggers an LED pattern, or (on robot vacuums) announces the error through a voice alert.
Vacuum cleaner error codes vary significantly by brand and type. A Roomba error code system is entirely different from a Dyson, Shark, or Miele system. Robot vacuums tend to have more elaborate error code systems than upright or canister vacuums, because they have more sensors and autonomous navigation components. However, the underlying fault categories are consistent: blockage, overheating, sensor malfunction, battery issues, and brush roll problems account for the vast majority of vacuum cleaner errors across all types.
One important characteristic of vacuum cleaner errors: the majority are caused by maintenance neglect rather than component failure. A clogged filter, a full dust bin, a tangled brush roll, or dirty sensor windows are responsible for most error codes. Regular maintenance — emptying the bin after every use, cleaning the filter monthly, and clearing the brush roll of hair and debris — prevents most errors before they occur.
Vacuum Cleaner Error Codes: 5 Categories Explained
1. Blockage Error Codes — Filter, Hose, or Brush Roll Clog
Blockage error codes (often displayed as “BLOCK,” a filter icon, or a specific numeric code) indicate that airflow through the vacuum is restricted below the minimum threshold for effective operation. The most common cause is a clogged filter. Most vacuum filters should be cleaned monthly and replaced every 3–12 months depending on usage and filter type. A severely clogged filter can reduce suction by 50% or more and trigger a blockage error even when the hose and brush roll are clear.
After checking the filter, inspect the hose and wand for blockages — a sock, a piece of paper, or compacted debris can completely block airflow. On robot vacuums, check the dust bin inlet and the brush roll compartment. Most blockage errors are resolved entirely by cleaning — no parts replacement required. If the error persists after thorough cleaning, the suction motor may have weakened and may need professional assessment.
2. Overheating Error Codes — Thermal Cutoff Triggered
Overheating error codes (often displayed as a thermometer icon, “HOT,” or a specific code) indicate that the vacuum’s motor has reached a temperature that triggered the thermal cutoff — a safety device that stops the motor to prevent damage or fire. The thermal cutoff resets automatically after the motor cools, typically within 30–60 minutes.
The root cause of overheating is almost always restricted airflow — a clogged filter, a blocked hose, or a jammed brush roll forces the motor to work harder, generating more heat. Allow the vacuum to cool completely, then clean the filter, clear any blockages, and empty the dust bin before restarting. If the vacuum overheats repeatedly after thorough cleaning, the motor may be failing or the thermal cutoff may have weakened — conditions that warrant professional assessment or replacement of the vacuum.
3. Sensor Error Codes — Cliff, Obstacle, or Dirt Sensors (Robot Vacuums)
Sensor error codes are most common on robot vacuums, which rely on multiple sensor types for navigation and safety. Cliff sensors (infrared sensors on the underside that detect drop-offs) are the most frequently triggered sensor error. Dirty cliff sensor windows — caused by dust accumulation — can cause the robot to misread a flat floor as a drop-off, preventing it from leaving the dock or causing it to stop mid-cycle.
⚠️ Important note: Cliff sensor errors can also be triggered by very dark floor surfaces (dark hardwood, dark tile, or black rugs) that absorb the infrared signal rather than reflecting it. If your robot vacuum consistently errors on dark floors, check the manufacturer’s documentation — some models have a “dark floor mode” or a sensitivity adjustment. Placing a physical boundary (a virtual wall or magnetic strip) around the problematic area is an alternative solution.
4. Battery Error Codes — Charging or Capacity Issues
Battery error codes (common on cordless stick vacuums and robot vacuums) indicate that the battery is not charging, is not holding a charge, or has degraded below a usable capacity. Lithium-ion batteries in cordless vacuums typically last 2–4 years or 300–500 charge cycles before capacity degrades noticeably. A battery that no longer holds a useful charge is the most common cause of battery error codes in older cordless models.
Before assuming battery failure, check the charging contacts on both the vacuum and the charger or dock — dirty or corroded contacts can prevent charging. Clean the contacts with a dry cloth or a cotton swab with isopropyl alcohol. If the contacts are clean and the battery still does not charge or hold a charge, replacement is the solution. Replacement batteries are available for most popular cordless vacuum models for $30–$80 and are generally straightforward to replace.
5. Brush Roll Error Codes — Jam or Motor Failure
Brush roll error codes (often displayed as a brush icon, “BRUSH,” or a specific code) indicate that the brush roll has stopped rotating. The most common cause is hair, string, or debris wrapped around the brush roll shaft — a condition that develops gradually with normal use and is the leading cause of brush roll errors. Most vacuum manufacturers recommend cleaning the brush roll every 1–4 weeks depending on usage.
To clear a brush roll jam: turn off and unplug the vacuum, remove the brush roll (usually by releasing a cover or pressing a release button), and cut away any wrapped hair or string with scissors. Be careful not to cut the brush bristles. After clearing the jam, reinstall the brush roll and test. If the brush roll spins freely but the error persists, the brush roll motor or the brush roll belt (on belt-driven models) may have failed.
How I Diagnosed and Fixed My Robot Vacuum Error — Step by Step
Step 1: Look Up the Error Code for My Specific Model
After the “Error 2” appeared, I searched for the error code along with my robot vacuum’s brand and model number. The manufacturer’s support page confirmed that Error 2 on my model indicated a cliff sensor fault. The troubleshooting guide listed three steps: clean the cliff sensor windows, check for dark floor surfaces, and restart the robot. I had not cleaned the sensor windows since purchasing the robot 18 months earlier.
What surprised me: the support page noted that cliff sensor errors are the most frequently reported error for my model — and that the fix is almost always cleaning the sensor windows. A 30-second maintenance task that I had never performed was responsible for a fault that I had assumed indicated a serious hardware problem.
Step 2: Clean the Cliff Sensor Windows
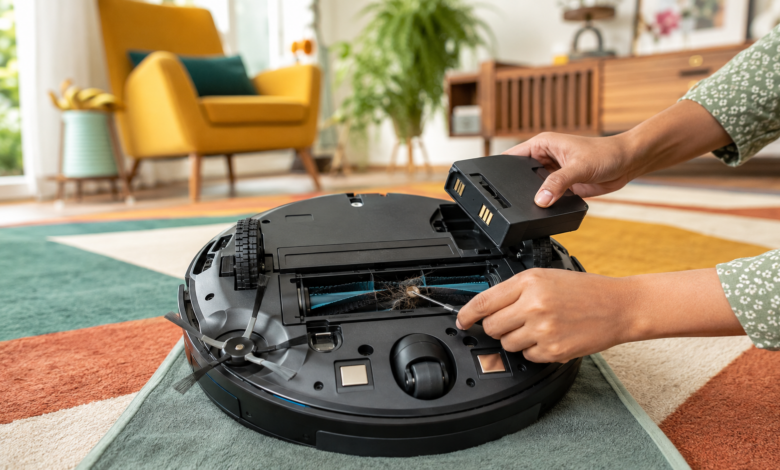
I turned the robot upside down and located the four cliff sensor windows — small plastic lenses on the underside of the machine. Each one had a visible layer of fine dust. I wiped each sensor window with a dry microfiber cloth, being careful not to press too hard on the plastic lenses. The entire process took about 30 seconds.
Step 3: Clean the Brush Roll and Dust Bin
While the robot was upside down, I also removed the brush roll and cleared the accumulated hair — there was a significant amount wrapped around both ends of the shaft. I emptied the dust bin and cleaned the filter. This was overdue maintenance that I had been neglecting alongside the sensor cleaning.
Step 4: Run a Test Cleaning Cycle
After reassembling the robot and returning it to the dock, I started a cleaning cycle. The robot left the dock immediately and completed a full room cleaning without any errors. The Error 2 code did not return. Total time for the fix: about 10 minutes, including the brush roll and filter cleaning.
Step 5: Establish a Regular Maintenance Schedule
After the experience, I set up a monthly maintenance routine for the robot vacuum: empty the dust bin after every use (or every 2–3 uses for light cleaning), clean the filter monthly, clear the brush roll of hair every 2 weeks, and wipe the cliff and obstacle sensor windows monthly. Most robot vacuum manufacturers publish a maintenance schedule in the owner’s manual — following it prevents the majority of error codes before they occur.
Frequently Asked Questions About Vacuum Cleaner Error Codes
What do vacuum cleaner error codes mean?
Vacuum cleaner error codes indicate a specific malfunction in the airflow, motor, sensor, battery, or brush roll system. They vary by brand and type — robot vacuums have more elaborate code systems than upright or canister models. Always look up the code with your specific brand and model number. The majority of vacuum errors are caused by maintenance neglect (clogged filter, dirty sensors, tangled brush roll) rather than component failure.
What causes a vacuum cleaner blockage error?
The most common cause is a clogged filter — clean or replace it first. Then check the dust bin or bag (empty or replace if full), the hose and wand for obstructions, and the brush roll for tangled hair or debris. Most blockage errors are fully resolved by cleaning. If suction remains weak after thorough cleaning, the motor may have weakened and may need professional assessment.
Why does my vacuum cleaner overheat and shut off?
Overheating is caused by restricted airflow — the motor works harder to maintain suction through a clogged filter or blocked hose, generating excess heat that triggers the thermal cutoff. Allow the vacuum to cool for 30–60 minutes, then clean the filter, clear any blockages, and empty the dust bin before restarting. If overheating recurs after cleaning, the motor may be failing.
What is a robot vacuum sensor error?
A robot vacuum sensor error most commonly indicates dirty cliff sensor windows — the infrared sensors on the underside that prevent the robot from falling down stairs. Wipe the sensor windows with a dry microfiber cloth. If the error persists on clean floors, check whether the floor surface is very dark (which can absorb the infrared signal). Some models have a dark floor mode or sensitivity adjustment for this situation.
How do I fix a vacuum cleaner battery error?
Check the charging contacts on the vacuum and charger for dirt or corrosion — clean with a dry cloth or isopropyl alcohol on a cotton swab. If the contacts are clean and the battery still does not charge or hold a charge, the battery needs replacement. Replacement batteries for most popular cordless vacuum models cost $30–$80 and are generally straightforward to install.
Vacuum Cleaner Repair Cost Comparison by Error Type
The table below provides estimated repair costs for common vacuum cleaner error code causes. DIY costs reflect the part or consumable only; professional costs include a typical service call and labor. Note that for many vacuum errors, the DIY fix is free — cleaning resolves the majority of faults.
| Error Type | Common Cause | DIY Cost (USD) | Professional Service Cost (USD) |
|---|---|---|---|
| Blockage Error — Filter | Filter cleaning or replacement | $0 – $20 | $50 – $100 |
| Blockage Error — Hose / Brush Roll | Manual clearing of obstruction | $0 | $50 – $100 |
| Overheating Error | Filter cleaning + cooling (thermal reset) | $0 – $20 | $60 – $120 (if motor failing) |
| Sensor Error — Cliff / Obstacle | Sensor window cleaning | $0 | $50 – $100 (if sensor replacement needed) |
| Battery Error | Battery replacement | $30 – $80 | $80 – $150 |
| Brush Roll Error — Motor / Belt | Brush roll belt or motor replacement | $10 – $40 | $60 – $150 |
Note: Costs are estimates based on typical U.S. market rates as of 2024–2025. For vacuums under $200, professional repair costs often approach or exceed the replacement cost — replacement may be more economical. For premium vacuums ($300+), repair is generally worth pursuing. Always obtain a written estimate before authorizing service.
Conclusion: Vacuum Cleaner Errors Are Almost Always a Maintenance Issue
The Error 2 that stopped my robot vacuum took 30 seconds to fix — a wipe of the cliff sensor windows with a microfiber cloth. The brush roll jam that I cleared at the same time took another 5 minutes. Neither required any parts, any tools, or any technical knowledge. That is the defining characteristic of vacuum cleaner errors: the vast majority are maintenance issues, not component failures.
For the vacuum cleaner error codes explained in this guide — blockage, overheating, sensor, battery, and brush roll errors — the diagnostic process always starts with cleaning. Clean the filter, empty the bin, clear the brush roll, wipe the sensors. In most cases, this resolves the error completely. Only if the error persists after thorough cleaning should component testing or replacement be considered.
The repair-vs-replace decision for vacuum cleaners is straightforward: for budget models under $200, professional repair costs often approach or exceed the cost of a new machine. For premium models ($300+), repair is worth pursuing — particularly for battery replacement, which is a common and inexpensive fix that restores full functionality to an otherwise well-functioning machine.
Sources
- U.S. Consumer Product Safety Commission (CPSC) — Vacuum Cleaner Safety and Maintenance Guidelines. Available at: www.cpsc.gov
- Association of Home Appliance Manufacturers (AHAM) — Vacuum Cleaner Industry Standards and Consumer Resources. Available at: www.aham.org
- International Electrotechnical Commission (IEC) — IEC 60312: Vacuum Cleaners for Household Use — Methods for Measuring the Performance. Available at: www.iec.ch
- Consumer Reports — Vacuum Cleaner Reliability and Repair Cost Survey, 2023. Available at: www.consumerreports.org
- iRobot Support — Roomba Error Code Reference and Troubleshooting Guide. Available at: homesupport.irobot.com