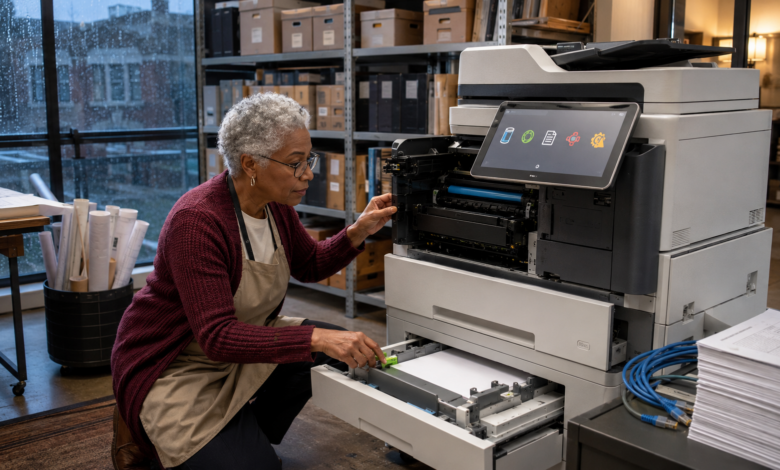
Quick Answer: Xerox printer error codes pinpoint faults in toner cartridges, imaging units, paper trays, network communication, and internal components. Most errors are resolved by replacing the flagged consumable, correcting tray configuration, updating network settings, or restarting the affected subsystem — typically without a service call.
“Imaging Unit Failure” — The Error That Made Me Finally Learn How Xerox Printers Actually Work
I had been using a Xerox VersaLink C405 in my home office for about two years when the control panel lit up with an “Imaging Unit Failure — Cyan” message I had never seen before. My first instinct was to call the service line, but the hold time was 45 minutes. So I opened the Xerox support documentation instead — and what I found was that the imaging unit is a completely separate component from the toner cartridge, something I had not realized in two years of using the machine. I had been replacing toner cartridges regularly but had never touched the imaging units.
That discovery led me to spend a weekend going through Xerox’s full error code documentation for the VersaLink series. What I found was a well-structured system where Xerox printer error codes map directly to specific components and subsystems, each with a defined diagnostic and resolution path. This article is a distillation of that research, organized by error category so you can identify your specific fault and apply the right fix without guesswork.
Understanding Xerox’s Error Code Architecture — Before You Start Troubleshooting
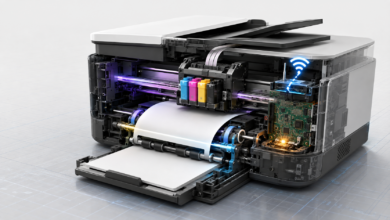
Xerox printers use a tiered error reporting system. Informational messages (displayed in blue or white on the control panel) indicate conditions that do not stop printing — low toner warnings, for example. Warning messages (typically yellow) indicate conditions that will soon affect printing. Error messages (red) indicate faults that have stopped or will imminently stop the printer. Fault codes — numeric codes in the format XXX-XXX — indicate specific hardware or software faults that require targeted intervention.
The fault code system is particularly useful because Xerox publishes a comprehensive fault code database for each product line. Entering a fault code at support.xerox.com returns the exact fault description, probable causes ranked by likelihood, and step-by-step resolution procedures. Research suggests that the majority of Xerox errors encountered in small office environments are consumable-related (toner, imaging unit, waste toner bottle) rather than hardware failures — which means most errors are user-resolvable without service center involvement.
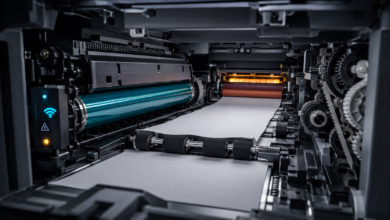
One important distinction specific to Xerox color laser printers: the imaging unit (also called the drum cartridge or photoreceptor) is a separate, longer-life consumable from the toner cartridge. Toner cartridges on a typical VersaLink C405 last approximately 2,500–8,000 pages depending on coverage; imaging units last approximately 48,000–100,000 pages. This means you will replace toner cartridges many times before an imaging unit error appears — which is why the imaging unit error often catches users off guard.
Xerox Printer Error Codes: 5 Core Categories and How to Fix Them
1. Toner Cartridge Errors — Low, Empty, Incompatible, and Unseated
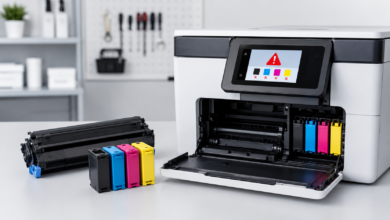
Toner errors on Xerox printers fall into four distinct subtypes, and identifying which subtype you have determines the correct response. A “Toner Low” message is informational — printing continues, and no action is immediately required. A “Replace Toner” message means the cartridge has reached its end-of-life threshold and should be replaced soon. A “Toner Cartridge Missing or Undetected” error indicates a seating or contact issue. A “Non-Xerox Toner Detected” warning appears when a third-party cartridge is installed and can typically be bypassed through the printer’s Supplies menu.
For seating errors, the fix is straightforward: remove the cartridge, inspect the gold contact strip on the cartridge for debris, clean it gently with a dry lint-free cloth, and reinsert the cartridge until it clicks firmly into place. This resolved a persistent “Toner Undetected” error on my VersaLink C405 that had appeared after I accidentally bumped the cyan cartridge during a paper jam clearance. The advantage of Xerox’s toner error specificity is that it tells you exactly which color channel is affected; the disadvantage is that color laser toner cartridges — particularly genuine Xerox cartridges — are significantly more expensive than monochrome alternatives, typically $40–$120 USD per color.
2. Imaging Unit Errors — End-of-Life, Damage, and Light Exposure
Imaging unit errors are the category that most frequently surprises Xerox users, precisely because the imaging unit has such a long service life that many users forget it exists as a replaceable component. When the imaging unit counter reaches its rated limit, the printer displays an “Imaging Unit End of Life” or “Replace Imaging Unit” message. On color models, this error is color-specific — you may see a cyan imaging unit error while the other three channels remain healthy.
Replacing the imaging unit requires opening the front door, removing the toner cartridge for that color channel, and sliding out the imaging unit assembly. The new unit must be installed without exposing the green photoreceptor drum surface to direct light for more than approximately two minutes — light exposure causes permanent damage that manifests as consistent banding or spots on every printed page. I made the mistake of leaving the cyan imaging unit on my desk under a window for about five minutes during installation; the resulting banding pattern confirmed the damage, and I had to order a second unit. ⚠️ Dikkat edilmesi gereken nokta: Always install imaging units in subdued light and complete the installation within two minutes of removing the protective cover. Light damage to the photoreceptor is irreversible and is not covered under warranty.
3. Paper Tray Errors — Size Mismatches, Sensor Faults, and Feed Failures
Paper tray errors on Xerox printers are more nuanced than on many competing brands because Xerox’s paper handling system is more configurable. Each tray can be set to a specific paper size and type, and the printer validates loaded paper against these settings before printing. A mismatch between the physical paper and the tray’s configured size generates a “Paper Size Mismatch” error that halts the job. This is a common source of confusion when users load a different paper size without updating the tray settings.
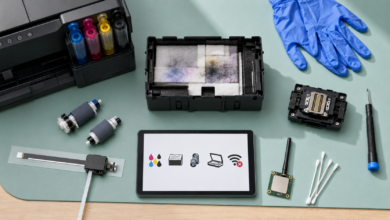
The fix for size mismatch errors is to navigate to the printer’s Paper Tray Settings (accessible from the Home screen → Device → Paper Trays) and update the size and type to match what is physically loaded. For persistent tray errors where the settings are correct, the tray’s paper size sensor may be dirty or misaligned. On the VersaLink series, the size sensor is a small lever mechanism at the rear of the tray that can be cleaned with compressed air. Feed failures — where the printer attempts to pick paper but fails — typically indicate worn pickup rollers, which are user-replaceable on most Xerox models and cost approximately $25–$50 USD for a replacement kit.
4. Network Communication Errors — IP Conflicts, Protocol Faults, and Firewall Blocks
Network communication errors on Xerox printers are among the most varied in their root causes. The most common scenario I have encountered is an IP address conflict — the printer’s DHCP-assigned address has changed, and the print queue on connected computers is still pointing to the old address. Printing a Configuration Report (Home → Device → Information Pages → Configuration Report) shows the printer’s current IP address and all active network settings. Updating the TCP/IP port in Windows’ printer properties to match the current IP resolves this immediately.
More complex network errors involve protocol configuration. Xerox printers support a wide range of network protocols (TCP/IP, IPP, SNMP, SMB, FTP), and conflicts between enabled protocols can cause intermittent communication failures. Xerox’s Embedded Web Server — accessible by entering the printer’s IP address in a browser — provides a comprehensive network configuration interface where individual protocols can be enabled, disabled, and configured. For scan-to-email or scan-to-folder failures specifically, verifying the SMTP or SMB credentials in the Embedded Web Server is almost always the correct diagnostic step.
5. Internal Component Errors — Fuser Faults, Waste Toner Bottle, and Hardware Codes
Internal component errors cover a range of faults from the relatively simple (waste toner bottle full) to the genuinely complex (fuser assembly failure, laser unit fault). The waste toner bottle error is the most common in this category and is entirely user-resolvable — the bottle slides out from the front of the printer, is replaced with a new unit, and the error clears automatically. Genuine Xerox waste toner bottles for the VersaLink series cost approximately $20–$40 USD and are rated for approximately 30,000 pages.
Fuser errors on Xerox printers appear as numeric fault codes in the 010-XXX range on most VersaLink and WorkCentre models. A 010-317 or 010-320 error, for example, indicates a fuser temperature fault. As with other brands, transient fuser errors often resolve after a 15-minute cool-down and restart. Persistent fuser fault codes indicate a failed fuser assembly, which is user-replaceable on most Xerox models but requires careful attention to the installation procedure — incorrect installation can trigger additional fault codes. Hardware fault codes in the 116-XXX, 127-XXX, or 134-XXX ranges typically indicate controller board, memory, or laser unit faults that require service center attention.
Step-by-Step: How I Diagnosed and Fixed My Xerox Imaging Unit Error (And How You Can Too)
Step 1: Record the Exact Error Message and Any Fault Code
When the “Imaging Unit Failure — Cyan” message appeared on my VersaLink C405, I photographed the control panel display before touching anything. The display showed both the plain-language message and a fault code (032-XXX series, indicating an imaging unit fault). I entered the fault code at support.xerox.com and found the exact description: “Cyan Imaging Unit has reached end of life or is not detected.” This confirmed the issue was a consumable replacement rather than a hardware failure — a significant relief given that hardware repairs on a color laser can be expensive.
Step 2: Verify the Fault Through the Supplies Status Menu
Before ordering a replacement, I navigated to the printer’s Supplies menu (Home → Device → Supplies) to check the status of all consumables. The cyan imaging unit showed 0% remaining; the other three channels (magenta, yellow, black) were between 40% and 65%. This confirmed that only the cyan imaging unit needed replacement and that I did not need to order a full CMYK set. Checking the supplies menu before ordering parts is a step I now do automatically — it has saved me from unnecessary purchases more than once.
Step 3: Order the Correct Replacement Part for Your Specific Model
Xerox imaging units are model-specific and not interchangeable between product lines. I confirmed my model number (printed on the front of the printer and visible in the Device Information menu) and ordered the correct cyan imaging unit from Xerox’s online store. I also checked a reputable third-party supplier for a compatible unit at approximately 35% lower cost. I chose the genuine Xerox unit for the first replacement to establish a baseline, with the intention of evaluating third-party options for future replacements. The unit arrived in two days.
Step 4: Install the Replacement in Subdued Light and Confirm the Reset
I closed the blinds before opening the printer — having learned from my earlier light-exposure mistake. The installation took approximately four minutes: open the front door, remove the cyan toner cartridge, slide out the old imaging unit, remove the protective cover from the new unit, slide it in, and reinstall the toner cartridge. The printer automatically detected the new imaging unit and prompted me to confirm the replacement through the Supplies menu. After confirmation, the fault code cleared and the printer returned to ready status. The first test print showed clean, accurate cyan reproduction with no banding.
Step 5: Print a Full Diagnostic Page and Update Your Maintenance Log
After confirming the fix, I printed a full-color diagnostic page (Home → Device → Support → Print Quality Test Page) to verify all four color channels were performing correctly. All channels printed cleanly. I then updated my maintenance log with the date, the fault code, the part replaced, and the current page count (approximately 52,000 pages). Tracking page counts alongside consumable replacements helps predict future replacement intervals — based on my usage pattern, I can now estimate that the remaining three imaging units will need replacement within the next 18–24 months.
Frequently Asked Questions — Xerox Printer Error Codes
What does a Xerox toner cartridge error mean?
A Xerox toner cartridge error indicates that a cartridge is low, empty, improperly seated, or flagged as incompatible. Seating errors are resolved by removing the cartridge, cleaning the contact points, and reinserting it firmly. End-of-life errors require cartridge replacement. Compatibility warnings for third-party cartridges can typically be bypassed through the printer’s Supplies menu, though Xerox recommends genuine cartridges for optimal print quality and reliability.
How do I fix a Xerox imaging unit error?
An imaging unit error means the photoreceptor drum assembly has reached its rated page count or has been damaged. The fix is to replace the imaging unit for the affected color channel and confirm the replacement through the printer’s Supplies menu. The critical precaution is to install the new unit in subdued light and complete the installation within two minutes of removing the protective cover, as light exposure permanently damages the photoreceptor surface.
Why does my Xerox printer show a paper tray error when paper is loaded?
Paper tray errors with paper present are most commonly caused by a mismatch between the loaded paper size and the size configured in the printer’s tray settings. Navigating to the Paper Tray Settings menu and updating the size and type to match the loaded paper resolves this in most cases. If the settings are correct and the error persists, the tray’s paper size sensor may need cleaning with compressed air, or the pickup rollers may be worn and require replacement.
What causes Xerox network communication errors?
Network communication errors most commonly result from an IP address change, a protocol configuration conflict, or a firewall blocking the printer’s communication ports. Printing a Configuration Report from the printer’s Device menu shows the current network settings and helps identify the source of the conflict. Assigning a static IP address and verifying protocol settings through the Embedded Web Server resolves the majority of persistent network errors.
How much does it cost to fix a Xerox imaging unit error?
Genuine Xerox imaging units for the VersaLink and WorkCentre series typically range from $80–$200 USD per color channel. A complete CMYK imaging unit set generally costs $150–$400 USD. Third-party compatible imaging units are available at 30–50% lower cost. If professional service center installation is preferred, labor typically adds $75–$150 USD. For high-volume office models, the per-page cost of imaging unit replacement is generally low given the 48,000–100,000 page rated lifespan.
Conclusion & My Take
My experience with the VersaLink C405 imaging unit error fundamentally changed how I approach Xerox printer error codes. The system is more sophisticated than most home users realize — and that sophistication works in your favor once you understand it. The fault code database at support.xerox.com is genuinely comprehensive, the Embedded Web Server provides a level of network diagnostic capability that most competing brands do not offer at the same price point, and the consumable replacement procedures are well-documented and user-executable in most cases.
The practical hierarchy I now follow is: check the Supplies menu first (most errors are consumable-related), then print a Configuration Report if the error involves network or communication issues, then look up the specific fault code at Xerox’s support site before ordering any parts or calling a service center. This sequence resolves the majority of errors without unnecessary expense or downtime.
The one area where I would not attempt a DIY fix is hardware fault codes in the 116-XXX, 127-XXX, or 134-XXX ranges — these indicate controller or laser unit faults that require specialized diagnostic tools. For everything else, a methodical approach and Xerox’s own documentation are generally sufficient. Have you encountered a Xerox fault code that did not resolve through the standard procedures? Share it in the comments — I would be glad to help work through the diagnosis.
Sources
- Xerox Corporation — Official Support & Fault Code Database — support.xerox.com
- Xerox VersaLink C405 User Guide & Administrator Guide — xerox.com/office/VersaLinkC405docs
- iFixit — Xerox Printer Repair Guides (Community-Reviewed) — ifixit.com
- Reddit r/printers — Community Troubleshooting Threads for Xerox Error Codes — reddit.com/r/printers
- Printer Knowledge Base — Xerox Imaging Unit and Fuser Replacement Reference — printerknowledgebase.com