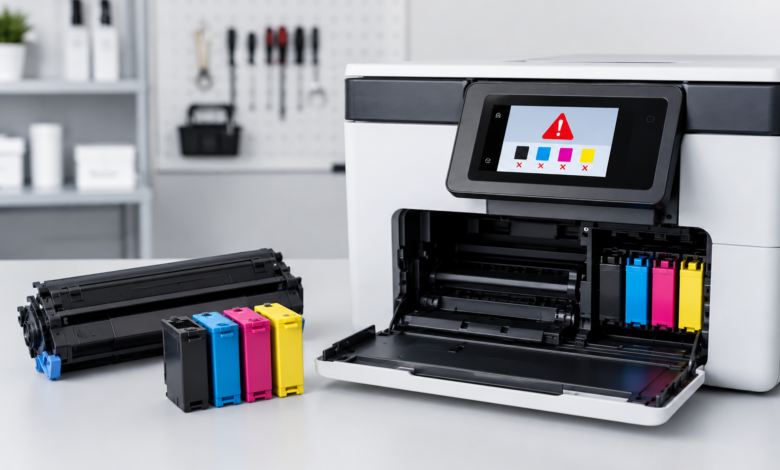
Quick Answer: Printer ink and toner error codes signal problems with cartridges that are empty, incompatible, unrecognized, incorrectly installed, or physically damaged. Most errors are resolved by cleaning the cartridge contacts, reseating the cartridge firmly, resetting the ink counter, or bypassing a non-genuine cartridge warning — without replacing the cartridge in many cases.
“Cartridge Problem — Printing Cannot Continue” — The Error That Taught Me How Printer Cartridge Systems Actually Work
I had just installed a fresh set of third-party ink cartridges in my Canon PIXMA TS8320 when the printer displayed “Ink Cartridge Problem — The following ink cartridge cannot be recognized.” I had used the same brand of compatible cartridges before without issue, so the error caught me off guard. I pressed OK to dismiss it, but the printer refused to print. I tried removing and reinserting the cartridges, restarting the printer, and reinstalling the driver — nothing worked. It was only when I started reading through Canon’s support documentation that I understood what was actually happening.
What I discovered was that printer ink and toner error codes cover a much wider range of conditions than I had assumed — not just empty cartridges, but contact failures, chip authentication issues, firmware-level compatibility blocks, and physical damage to the cartridge or carriage. Each condition has a different cause and a different fix. This article documents the full range of cartridge error types and the correct response to each, so you can resolve the error without unnecessary cartridge replacements.
How Printer Cartridge Error Detection Works — and Why It Sometimes Gets It Wrong
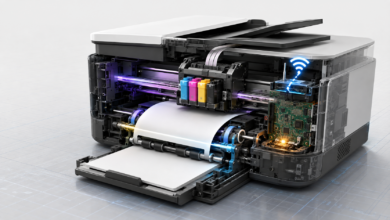
Modern inkjet and laser printers communicate with their cartridges through a set of electrical contacts that connect the printer’s controller board to a small chip embedded in the cartridge. This chip stores information about the cartridge: the ink or toner level, the cartridge model number, the manufacturer identifier, and in some cases a cryptographic authentication key. When the printer detects a problem reading this chip — or when the chip reports a condition the printer is programmed to flag — an error is generated.
The chip-based system is why cartridge errors are not always straightforward. A dirty contact can prevent the printer from reading a perfectly functional cartridge, generating a “not recognized” error for a brand-new genuine cartridge. A firmware update can change the authentication requirements, causing previously accepted third-party cartridges to suddenly generate incompatibility warnings. A cartridge that was dropped before installation may have a damaged chip that reports incorrect ink levels. Understanding that the error reflects the printer’s reading of the chip — not necessarily the actual state of the cartridge — is the key insight that makes cartridge troubleshooting much more logical.
Research suggests that a significant proportion of “cartridge not recognized” and “ink system failure” errors in home printers are caused by contact issues rather than actual cartridge faults. This means that cleaning the contacts — a two-minute procedure — resolves a large share of cartridge errors without any replacement cost. It is always worth attempting contact cleaning before concluding that a cartridge is defective.
Printer Ink and Toner Error Codes: 5 Core Categories and How to Fix Them
1. Empty and Low Cartridge Errors — What the Levels Actually Mean
Empty and low cartridge errors are the most common category and also the most straightforward — but there are nuances worth understanding. Inkjet printers estimate ink levels based on the number of droplets fired rather than by directly measuring the ink remaining in the cartridge. This means the displayed ink level is an estimate, and the actual remaining ink may be higher or lower than indicated. On Canon and Epson inkjet models, it is common to have 5–15% of usable ink remaining when the “low” warning first appears.
For laser printers, toner level estimates are similarly approximate. Many laser printers allow printing to continue past the “Replace Toner” warning by pressing a continue button, and in practice the cartridge often yields several hundred additional pages before output quality degrades noticeably. The advantage of continuing past the warning is obvious — you get more use from the cartridge. The disadvantage is that print quality may degrade gradually, and on some inkjet models, running the printhead completely dry risks permanent printhead damage. Replacing inkjet cartridges at the “low” warning rather than waiting for the “empty” error is generally the safer approach for printhead longevity.
2. Unrecognized and Not Detected Errors — Contact Cleaning and Reseating
Unrecognized cartridge errors are the category where contact cleaning resolves the problem most reliably. The gold contact strip on the cartridge and the corresponding spring-loaded contacts in the printer’s carriage accumulate ink residue, dust, and oxidation over time, which can interrupt the electrical connection. On my Canon PIXMA TS8320, the “cannot be recognized” error for the magenta cartridge was resolved entirely by cleaning the contacts — the cartridge itself was fine.
The cleaning procedure is simple: remove the cartridge, dampen a lint-free cloth or cotton swab with distilled water (not tap water, which leaves mineral deposits), and gently wipe the gold contact strip on the cartridge. Allow it to dry completely — approximately two minutes — before reinserting. For the contacts inside the printer’s carriage, use a dry cotton swab to remove any visible debris. Avoid using alcohol on inkjet cartridge contacts, as it can damage the chip’s protective coating on some cartridge designs. After cleaning, reinsert the cartridge firmly until it clicks into place. If the error persists after two cleaning attempts, the cartridge chip may be damaged and the cartridge should be replaced.
3. Incompatible and Non-Genuine Cartridge Errors — Bypassing and Understanding the Risks
Incompatible cartridge errors appear when the printer’s firmware detects a cartridge that does not match its authentication requirements. This can happen with third-party compatible cartridges, refilled cartridges, or genuine cartridges from a different regional market. Most printers display a warning and offer a bypass option — pressing OK or Continue allows printing to proceed. Some printers, particularly those that have received recent firmware updates, may not offer a bypass and will refuse to print entirely with non-genuine cartridges.
The decision to use third-party cartridges involves a genuine trade-off. Compatible cartridges typically cost 40–60% less than genuine cartridges and perform adequately for standard document printing in most cases. However, print quality for photos and graphics may be noticeably lower, and some compatible cartridges have been reported to cause printhead clogging at higher rates than genuine cartridges. If your printer has received a firmware update that blocks third-party cartridges, rolling back the firmware (where possible) or contacting the cartridge manufacturer for a chip-updated replacement are the main options. ⚠️ Dikkat edilmesi gereken nokta: Never install a firmware update on a printer that is currently working with third-party cartridges without first checking whether the update includes cartridge authentication changes. Several major printer manufacturers have used firmware updates specifically to block previously accepted compatible cartridges.
4. Incorrectly Installed Cartridge Errors — Seating, Orientation, and Protective Tab Removal
Incorrectly installed cartridge errors are surprisingly common, particularly with new cartridges, and they are almost always user-resolvable. The three most frequent installation mistakes are: failing to remove the protective tape or plastic tab from the cartridge before installation (this tab covers the ink nozzles or toner outlet and must be removed), installing the cartridge in the wrong slot (color cartridges are slot-specific on multi-cartridge printers), and not pressing the cartridge firmly enough into the carriage until it clicks into the locked position.
On inkjet printers with individual color cartridges, each slot is typically color-coded or labeled — cyan goes in the cyan slot, magenta in the magenta slot, and so on. Installing a cartridge in the wrong slot generates an error and can potentially cause color mixing if the printer attempts to use the misplaced cartridge. For laser toner cartridges on color printers, the cartridges are usually keyed so they can only be inserted in the correct orientation, but it is still possible to insert them without fully seating them. A cartridge that is 90% seated but not fully locked will generate a “not installed” or “not detected” error even though it appears to be in place.
5. Damaged Cartridge Errors — Physical Damage, Chip Faults, and Leaking Cartridges
Damaged cartridge errors indicate a physical problem with the cartridge itself rather than a contact or installation issue. Common causes include a cracked cartridge body (often from being dropped), a damaged or corroded chip, a leaking ink seal, or a toner cartridge with a cracked drum or damaged seal. These errors typically persist regardless of how many times the cartridge is removed and reinserted, and they do not respond to contact cleaning.
A leaking inkjet cartridge is a particularly urgent situation — ink leaking inside the printer’s carriage can damage the printhead, the carriage belt, and the encoder strip, all of which are expensive to replace. If you notice ink on the carriage or on printed pages in unexpected locations, remove all cartridges immediately and inspect each one for leaks. A leaking cartridge should be sealed in a plastic bag and disposed of — do not attempt to continue using it. For laser printers, a toner cartridge with a cracked seal will deposit loose toner inside the printer, which can contaminate the drum unit, the fuser, and the paper path. Loose toner inside a laser printer requires careful cleaning with a toner-specific vacuum (not a standard household vacuum, which can spread fine toner particles into the air).
Step-by-Step: How I Resolved My Canon ‘Cartridge Not Recognized’ Error
Step 1: Identify Which Cartridge Is Generating the Error
The Canon status monitor on my computer showed the error was specific to the magenta cartridge — not all cartridges, which would have suggested a carriage or firmware issue. This was useful information: a single-cartridge error almost always points to that cartridge or its contacts, while an all-cartridges error more often points to a firmware or carriage issue. I removed only the magenta cartridge and left the others in place, which confirmed the error was isolated to that slot.
Step 2: Inspect the Cartridge and Contacts Visually
I examined the magenta cartridge under good lighting. The gold contact strip had a faint smear of magenta ink across two of the contact pads — likely from a previous installation where the cartridge had been handled with ink-stained fingers. The contacts in the printer’s carriage slot also showed a small amount of dried ink residue. Neither issue was severe, but both were sufficient to interrupt the electrical connection intermittently.
Step 3: Clean the Contacts and Allow to Dry
I cleaned the cartridge’s contact strip with a lint-free cloth dampened with distilled water, using gentle circular motions. The ink smear came off cleanly after two passes. I then used a dry cotton swab to clean the carriage contacts, removing the dried residue carefully without bending the spring-loaded contact pins. I allowed both the cartridge and the carriage contacts to dry for three minutes before proceeding. This step — waiting for complete drying — is one I used to skip, and skipping it caused me to reinsert cartridges with slightly damp contacts that generated intermittent errors.
Step 4: Reinstall and Test
I reinserted the magenta cartridge firmly until I heard and felt the click of the locking mechanism engaging. The printer’s status monitor updated immediately — the magenta cartridge was now recognized and showing the correct ink level. I ran a nozzle check print to confirm the magenta nozzles were firing correctly. All nozzles printed cleanly. The entire process from error to resolution took approximately eight minutes.
Step 5: Prevent Recurrence with Proper Cartridge Handling
After resolving the error, I established a few handling habits to prevent recurrence. I now hold cartridges by the sides rather than the top or bottom, avoiding contact with the gold strip entirely. I store spare cartridges in their original sealed packaging until needed, as exposure to air and light degrades the ink and can affect chip performance over time. I also check the carriage contacts for residue every time I replace a cartridge — a 30-second inspection that has prevented two potential contact errors since I started doing it.
Frequently Asked Questions — Printer Ink and Toner Error Codes
Why does my printer say ‘Cartridge Not Recognized’ after installing a new one?
A Cartridge Not Recognized error after installing a new cartridge is most commonly caused by dirty or misaligned electrical contacts between the cartridge and the printer’s carriage. Removing the cartridge, cleaning the gold contact strip with a lint-free cloth dampened with distilled water, allowing it to dry completely, and reinserting it firmly resolves this in most cases. If the error persists after cleaning, the cartridge may be incompatible with your printer model or the printer’s firmware may have been updated to block certain third-party cartridges.
How do I bypass an incompatible or non-genuine cartridge warning?
Most printers allow bypassing non-genuine cartridge warnings by pressing OK or Continue when the warning appears on the control panel or status monitor. Some models require navigating to the Settings or Supplies menu to disable non-genuine cartridge detection. If the printer’s firmware has been updated to block third-party cartridges entirely without a bypass option, rolling back the firmware or contacting the cartridge manufacturer for a chip-updated replacement are the main alternatives.
What does an ‘Ink System Failure’ or ‘Ink Cartridge Problem’ error mean?
These errors indicate a communication failure between the printer and one or more cartridges — caused by dirty contacts, incorrect seating, a damaged cartridge chip, or a hardware fault in the ink delivery system. Removing all cartridges, cleaning the contacts, and reinserting them one at a time while testing after each reinstallation helps isolate which cartridge is causing the error. If the error persists after cleaning and reseating all cartridges, a hardware fault in the printer’s carriage or controller board may be involved.
Can I use a printer with a low ink warning and ignore it?
Low ink warnings are generally informational and printing can continue for some time after the warning appears. However, for inkjet printers, running the printhead completely dry risks permanent printhead damage, as ink also serves as a coolant for the printhead heating elements. Replacing inkjet cartridges at the low warning rather than waiting for the empty error is generally advisable for printhead longevity. For laser printers, continuing past a low toner warning typically results in faded output rather than hardware damage.
How much does it cost to replace ink or toner cartridges?
Standard inkjet cartridges range from $10–$35 USD per color for genuine cartridges; high-yield XL versions range from $20–$50 USD and offer better cost-per-page value. Laser toner cartridges for home models range from $20–$80 USD for genuine cartridges. Third-party compatible cartridges are generally available at 40–60% lower cost. EcoTank and similar refillable ink tank systems have higher upfront printer costs but substantially lower per-page ink costs over the printer’s lifetime.
Conclusion & My Take
The most useful reframe I have found for printer ink and toner error codes is to treat them as chip communication errors first and actual cartridge problems second. In my experience, the majority of cartridge errors — including “not recognized,” “cartridge problem,” and “ink system failure” — are caused by contact issues that resolve with a two-minute cleaning procedure. Replacing a cartridge before attempting contact cleaning is a common and expensive mistake.
The hierarchy I now follow is: clean the contacts first, reseat the cartridge firmly second, check for protective tab removal third, and only then consider whether the cartridge itself is defective or incompatible. This sequence resolves the majority of cartridge errors without any replacement cost. The exception is a physically damaged or leaking cartridge — these should be replaced immediately, as continuing to use them risks damage to the printer’s more expensive internal components.
If you are dealing with a firmware-level block on third-party cartridges, the calculus is more complex — the cost savings of compatible cartridges need to be weighed against the risk of print quality issues and the inconvenience of bypass procedures. Have you encountered a cartridge error that did not respond to contact cleaning? Share the details in the comments — the specific error message and printer model usually point directly to the cause.
Sources
- Canon USA — Ink Cartridge Troubleshooting & Error Code Documentation — usa.canon.com/support
- HP Inc. — Ink and Toner Cartridge Error Resolution Guides — support.hp.com
- iFixit — Printer Cartridge and Printhead Repair Guides (Community-Reviewed) — ifixit.com
- Reddit r/printers — Community Troubleshooting Threads for Cartridge Recognition Errors — reddit.com/r/printers
- Printer Knowledge Base — Cartridge Chip Authentication and Contact Maintenance Reference — printerknowledgebase.com