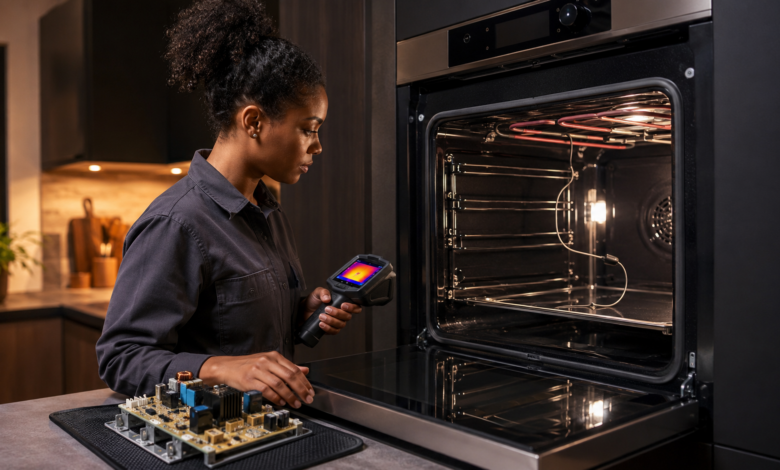
Quick answer: Oven error codes and troubleshooting covers four main fault categories — temperature sensor errors (RTD or thermistor failure), control board errors (relay failure or stuck key), door-lock errors (self-clean latch or motor failure), and heating errors (bake or broil element failure). A circuit breaker reset clears many temporary errors; persistent codes require component testing with a multimeter before replacement.
“F3” — The Code That Appeared Right Before Thanksgiving
The timing could not have been worse. Two days before Thanksgiving, my oven displayed “F3” and refused to heat. The display showed the set temperature, the preheat indicator came on, but the oven never got warm. I pressed cancel, waited, and tried again. F3 came back within two minutes. With a house full of guests arriving in 48 hours, I needed to understand what F3 meant — and whether I could fix it myself.
It turned out to be a failed temperature sensor — a $25 part and a 15-minute repair. This oven error codes and troubleshooting guide covers the four most common oven fault categories, what they mean, and how to approach them systematically — whether you have 48 hours or 48 minutes to spare.
How Oven Error Codes Work
Modern electric and gas ovens use electronic control boards that continuously monitor the oven cavity temperature, element operation, door-lock status, and keypad inputs. When a sensor reading falls outside the expected range — or a component fails to respond — the control board logs a fault and displays an error code on the display panel.
Oven error codes are not standardized across brands. An “F3” on a Whirlpool or Maytag typically indicates a temperature sensor error, but the same code on a different brand may mean something entirely different. The “F” codes used by Whirlpool-family brands (Whirlpool, Maytag, KitchenAid, Amana) follow a relatively consistent pattern, while Samsung, LG, GE, and Bosch use their own code systems. Always look up the code with your specific brand and model number.
One important characteristic of oven error codes: many are triggered by the self-cleaning cycle. The extreme temperatures of a self-clean cycle (up to 900°F / 480°C) stress every component in the oven — temperature sensors, control boards, door-lock motors, and heating elements. A significant proportion of oven service calls occur in the days following a self-clean cycle.
Oven Error Codes: 5 Categories Explained
1. Temperature Sensor Error Codes — RTD or Thermistor Failure
Temperature sensor error codes (commonly F3, E1, or similar) indicate a problem with the oven temperature sensor — an RTD (resistance temperature detector) probe that extends into the oven cavity and monitors temperature. The control board uses this reading to regulate the heating elements and maintain the set temperature. A faulty RTD may cause the oven to overheat, underheat, or display an error immediately upon startup.
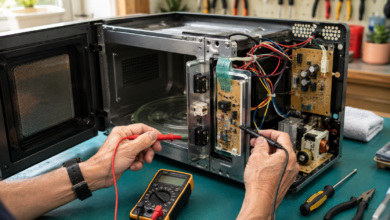
The RTD sensor can be tested with a multimeter. At room temperature (approximately 70°F / 21°C), most oven RTD sensors read approximately 1,080–1,100 ohms. A reading significantly outside this range — or an open circuit — confirms sensor failure. Replacement sensors are widely available for $15–$40 and are one of the most accessible oven repairs: the sensor is typically secured by two screws inside the oven cavity and connected by a two-wire harness.
2. Control Board Error Codes — Relay Failure or Stuck Key
Control board error codes (often F1, F7, or similar) indicate a problem with the main electronic control board. Common causes include a stuck or shorted key on the membrane keypad (which the control board interprets as a continuous input), a failed relay on the control board (which controls power to the heating elements), or general board failure due to power surge or heat damage.
A power reset — turning off the oven’s circuit breaker for 30–60 seconds — clears many temporary control board errors caused by power fluctuations. If the error returns immediately after the reset, the control board or keypad is likely the issue. Replacing the membrane keypad alone (if it is a separate component from the board) sometimes resolves F7-type “stuck key” errors at a lower cost ($30–$80) than a full control board replacement ($100–$300).
3. Door-Lock Error Codes — Self-Clean Latch or Motor Failure
Door-lock error codes (often F9, E5, or a lock icon) indicate a problem with the automatic door-lock mechanism. This mechanism is used exclusively during the self-cleaning cycle to prevent the oven door from being opened at extreme temperatures. The door-lock motor drives a latch that physically locks the door; a latch switch confirms to the control board that the door is locked.
⚠️ Important note: If the oven is stuck in a locked state after a self-clean cycle, do not attempt to force the door open. Allow the oven to cool completely (this may take 1–2 hours after the cycle ends), then try a circuit breaker reset. If the door remains locked after cooling and a reset, the door-lock motor or latch switch has likely failed and needs replacement. Forcing the door can damage the latch mechanism and the door itself.
4. Heating Element Error Codes — Bake or Broil Element Failure
Heating element error codes (often F2, E2, or a heat icon) indicate that the bake element (bottom of the oven cavity) or broil element (top of the oven cavity) is not functioning correctly. A failed element may be visually obvious — look for visible breaks, blistering, burn marks, or areas where the element glows brighter than others. A failed element can also be confirmed with a multimeter continuity test.
Replacement bake elements are widely available for $20–$50 and are one of the more accessible oven repairs. The element is typically secured by two screws at the back of the oven cavity and connected by two terminals. Always disconnect power at the circuit breaker before accessing the element terminals. Broil elements follow the same replacement process and are similarly priced.
5. Runaway Temperature Error Codes — Overheating Protection
Runaway temperature error codes (often F2 on some brands, or a separate “runaway” code) indicate that the oven temperature has exceeded a safe threshold — typically 590°F (310°C) for a standard bake cycle. This can be caused by a failed temperature sensor that is sending incorrect readings to the control board (causing the board to keep the elements on), a stuck relay on the control board that keeps the element energized, or a genuine overheating condition.
A runaway temperature error is a safety-critical fault. The oven should not be operated until the cause is identified and resolved. If the temperature sensor tests within the expected resistance range, the control board relay is the likely cause — a condition that requires control board replacement or professional diagnosis.
How I Diagnosed and Fixed My “F3” Temperature Sensor Error — Step by Step
Step 1: Look Up the Code for My Specific Brand and Model
My first step was to search “F3 oven error” along with my oven’s brand and model number. The service documentation confirmed that F3 on my model indicated an open circuit in the oven temperature sensor — meaning the sensor was reading outside the expected resistance range. The manual listed two possible causes: a failed sensor or a wiring harness issue between the sensor and the control board.
What I had not expected: the manual also noted that F3 could be triggered by a sensor that had simply come loose from its mounting bracket inside the oven cavity. I checked — it was still firmly mounted. The sensor itself had failed.
Step 2: Perform a Circuit Breaker Reset
Before ordering any parts, I turned off the oven’s circuit breaker for 60 seconds, then restored power. The F3 error returned within 90 seconds of the oven attempting to preheat. This confirmed the issue was not a temporary control board glitch — the sensor was genuinely out of range.
Step 3: Test the Temperature Sensor with a Multimeter
I disconnected power at the circuit breaker, removed the two screws securing the RTD sensor inside the oven cavity, and carefully pulled the sensor and its wiring harness through the back wall of the oven. I disconnected the two-pin connector and tested the sensor with a multimeter set to resistance (ohms). The reading was “OL” (open loop / infinite resistance) — confirming the sensor had failed open. A functioning sensor at room temperature should read approximately 1,080–1,100 ohms.
Step 4: Order and Install the Replacement Sensor
I ordered a replacement RTD sensor for my oven model for $25. It arrived the next day. Installation was the reverse of removal: feed the new sensor’s wiring harness through the back wall, connect the two-pin connector, position the sensor in the cavity, and secure with two screws. Total installation time: approximately 15 minutes. The oven preheated normally on the first attempt after the repair — no F3 error.
Step 5: Verify and Note the Self-Clean Cycle Risk
After confirming the repair, I researched why the sensor had failed. The oven was seven years old and I had run the self-clean cycle approximately once per month. Several appliance technician forums noted that frequent self-clean cycles significantly shorten the lifespan of temperature sensors, control boards, and door-lock motors due to the extreme heat involved. I now run the self-clean cycle no more than twice per year and clean the oven manually between cycles.
Frequently Asked Questions About Oven Error Codes
What do oven error codes mean?
Oven error codes are fault codes displayed on the control panel to indicate a specific malfunction detected by the control board. They fall into five main categories: temperature sensor errors, control board errors, door-lock errors, heating element errors, and runaway temperature errors. Always look up the code with your specific brand and model number — the same code can mean different things on different brands.
What is an oven temperature sensor error code?
A temperature sensor error code (often F3, E1, or similar) indicates that the oven RTD sensor is reading outside the expected resistance range. At room temperature, most oven RTD sensors should read approximately 1,080–1,100 ohms. A reading significantly outside this range, or an open circuit, confirms sensor failure. Replacement sensors are typically $15–$40 and are one of the most accessible oven repairs.
What causes an oven control board error code?
Control board error codes (often F1, F7, or similar) are caused by a stuck or shorted keypad key, a failed relay on the control board, or general board failure due to power surge or heat damage from the self-clean cycle. A circuit breaker reset (30–60 seconds) clears many temporary errors. If the error persists, the keypad or control board needs replacement. Replacing the keypad alone ($30–$80) is worth trying before replacing the full control board ($100–$300).
What does an oven door-lock error code mean?
A door-lock error code (often F9, E5, or a lock icon) indicates a problem with the automatic door-lock mechanism used during the self-cleaning cycle. If the oven is stuck locked after a self-clean cycle, allow it to cool completely, then try a circuit breaker reset. Do not force the door open. If the door remains locked after cooling and a reset, the door-lock motor or latch switch has failed and needs replacement.
How do I fix an oven heating element error code?
Visually inspect the bake and broil elements for breaks, blistering, or burn marks. Test the element with a multimeter for continuity — no continuity confirms failure. Replacement elements are $20–$50 and are accessible for a confident DIYer. Always disconnect power at the circuit breaker before accessing element terminals. If both elements test good and the error persists, the control board relay may be the cause.
Oven Repair Cost Comparison by Error Type
The table below provides estimated repair costs for common oven error code causes in the United States. DIY costs reflect the part only; professional costs include a typical service call and labor. Costs are indicative and vary by brand, model, and oven type (electric vs. gas).
| Error Type | Common Cause | DIY Part Cost (USD) | Professional Repair Cost (USD) |
|---|---|---|---|
| Temperature Sensor Error (F3 / E1) | RTD sensor replacement | $15 – $40 | $100 – $200 |
| Control Board — Stuck Key (F7) | Membrane keypad replacement | $30 – $80 | $100 – $200 |
| Control Board — Relay Failure (F1) | Main control board replacement | $100 – $300 | $200 – $500 |
| Door-Lock Error (F9 / E5) | Door-lock motor or latch switch | $30 – $80 | $100 – $250 |
| Heating Element Error (F2 / E2) | Bake or broil element replacement | $20 – $50 | $100 – $250 |
| Runaway Temperature Error | Sensor or control board relay | $15 – $300 | $150 – $500 |
Note: Costs are estimates based on typical U.S. market rates as of 2024–2025. Gas oven repairs involving gas components (igniter, gas valve) require a qualified technician in most jurisdictions. Always obtain a written estimate before authorizing repairs. If repair costs exceed 50% of the oven’s current market value, replacement may be more cost-effective.
Conclusion: Most Oven Errors Are Diagnosable — If You Know the Code
The F3 error that appeared two days before Thanksgiving turned out to be a $25 sensor and 15 minutes of work. Without knowing what the code meant, I might have called a technician, waited days for an appointment, and paid $150–$200 for the same repair. That is the practical value of understanding oven error codes and troubleshooting: it converts a cryptic fault code into a specific, testable component.
The most important lesson from this experience — and from researching oven faults more broadly — is the relationship between the self-clean cycle and component failure. The extreme temperatures of a self-clean cycle stress every electronic and mechanical component in the oven. Running the self-clean cycle frequently significantly increases the likelihood of temperature sensor, control board, and door-lock failures. Manual cleaning between cycles is a practical way to extend the life of these components.
For most oven error codes, the diagnostic process is the same: identify the code category, perform a circuit breaker reset, test the relevant component with a multimeter, and replace only what has failed. Temperature sensors, heating elements, and door-lock motors are accessible and affordable. Control board replacements are more expensive and warrant a cost-benefit assessment. Gas oven repairs involving gas components should always be handled by a qualified technician.
Sources
- U.S. Consumer Product Safety Commission (CPSC) — Range and Oven Safety Guidelines. Available at: www.cpsc.gov
- Association of Home Appliance Manufacturers (AHAM) — Cooking Appliance Industry Standards and Consumer Resources. Available at: www.aham.org
- International Society of Certified Electronics Technicians (ISCET) — Appliance Service Technician Certification Standards. Available at: www.iscet.org
- Ahrens M — «Home Fires Involving Cooking Equipment». National Fire Protection Association (NFPA) Research, 2021.
- Consumer Reports — Range and Oven Reliability and Repair Cost Survey, 2023. Available at: www.consumerreports.org