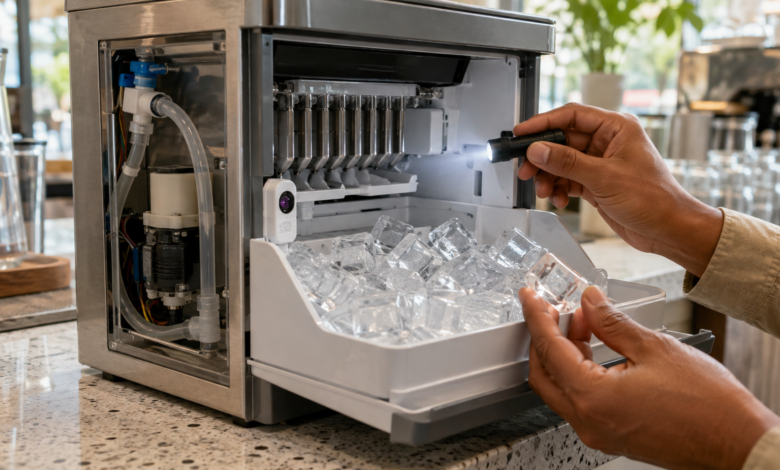
Quick answer: Ice maker error codes and solutions cover four main fault categories — water supply errors (inlet valve, water line, or clogged filter), freezing errors (temperature out of range), sensor errors (thermistor or ice level sensor failure), and ice production errors (harvest motor or ejector arm failure). Most ice maker problems start with the water supply or filter — check these first before assuming a component failure.
“Ice Maker Off” — The Error That Wasn’t an Error
My ice maker stopped producing ice on a Thursday. By Saturday, I had no ice for the weekend. I checked the display on my refrigerator and saw a blinking indicator that I had never noticed before. I assumed it was an error code. After 20 minutes of research, I discovered it was the ice maker’s “arm up” indicator — meaning the wire shutoff arm had been accidentally bumped into the off position when I loaded groceries. I pushed the arm down, and ice production resumed within two hours.
That experience taught me the first rule of ice maker error codes and solutions: always check the simplest things first. This guide covers the actual error codes — water supply, freezing, sensor, and production failures — but it starts with the checks that resolve the majority of ice maker complaints before any code is even displayed.
How Ice Maker Error Codes Work
Ice makers — whether built into a refrigerator or standalone units — use a control module that monitors the water fill cycle, freezing temperature, harvest cycle timing, and ice bin level. When a sensor reading falls outside the expected range, or a cycle fails to complete within the expected time, the control module logs a fault. On refrigerators with display panels, this fault may appear as an error code. On simpler ice makers, the fault may be indicated by a blinking LED pattern or an audible alarm.
Ice maker error codes are among the least standardized of all appliance codes. Samsung, LG, Whirlpool, GE, and other brands each use their own code systems, and the same code can mean entirely different things across brands. Additionally, many ice maker problems do not produce a visible error code at all — the ice maker simply stops producing ice. For this reason, systematic troubleshooting is often more useful than code lookup alone.
The freezer temperature is the single most important variable for ice maker performance. Most ice makers require a freezer temperature of 0°F (-18°C) or below for reliable ice production. A freezer running at 10°F (-12°C) may produce ice slowly or not at all, without displaying any error code.
Ice Maker Error Codes: 5 Categories Explained
1. Water Supply Error Codes — Inlet Valve, Water Line, or Filter
Water supply error codes (often displayed as a water drop icon, “IE,” or a numeric code depending on brand) indicate that the ice maker is not receiving water or is not filling to the required level within the expected time. The water fill cycle typically takes 7–10 seconds; if the ice maker does not detect adequate water within this window, it logs a water supply fault.
The most common cause is a clogged water filter. Most refrigerator manufacturers recommend replacing the water filter every 6 months or after 200–300 gallons of use. A severely clogged filter can reduce water flow to the point where the ice maker cannot fill properly. Replacing the filter is the first step for any water supply error. If the error persists after a filter change, check the water supply valve behind the refrigerator (confirm it is fully open), the water line for kinks, and household water pressure (should be at least 20 psi for most ice makers).
2. Freezing Error Codes — Temperature Out of Range
Freezing error codes indicate that the ice maker compartment temperature is outside the range required for ice production — either too warm (ice not forming) or too cold (ice maker frozen up). Most ice makers require a temperature between -5°F and 5°F (-21°C to -15°C) in the ice maker compartment for reliable operation.
A freezer that is too warm may indicate a refrigerator cooling problem (see the refrigerator error codes guide for cooling fault diagnosis). A freezer that is too cold — below -10°F (-23°C) — can cause the water in the ice maker fill tube to freeze solid, blocking water flow. If the fill tube is frozen, a hair dryer on low heat can thaw it carefully. Addressing the root cause (thermostat calibration or airflow issues) prevents recurrence.
3. Sensor Error Codes — Thermistor or Ice Level Sensor Failure
Sensor error codes indicate a problem with the thermistor (temperature sensor) that monitors the ice maker compartment, or with the ice level sensor that detects when the ice bin is full. Ice level sensors are either mechanical (a wire arm that rises as ice accumulates) or optical (an infrared beam that is interrupted when ice reaches a certain level).
A faulty thermistor may cause the ice maker to stop cycling or to freeze up. The thermistor can be tested with a multimeter — the expected resistance at a given temperature is listed in the service manual. A faulty optical ice level sensor may cause the ice maker to stop production even when the bin is not full. Cleaning the optical sensor lenses (small plastic windows on the side of the ice bin area) with a dry cloth sometimes resolves false “bin full” signals caused by frost or debris on the lenses.
4. Ice Production Error Codes — Harvest Motor or Ejector Arm Failure
Ice production error codes indicate a problem with the harvest cycle — the process by which the ice maker heats the ice mold slightly, then rotates the ejector arm to push the ice cubes into the bin. A failed harvest motor, a jammed ejector arm, or a failed harvest heater can all prevent ice from being ejected, causing the ice maker to stop cycling.
⚠️ Important note: A jammed ejector arm is often caused by oversized ice cubes that did not release cleanly from the mold — sometimes due to low water pressure producing incompletely formed cubes, or a harvest heater that is not warming the mold sufficiently. Do not attempt to manually force a jammed ejector arm — this can break the arm or damage the ice maker module. Instead, unplug the refrigerator, allow the ice maker to thaw completely, then restore power and run a test cycle.
5. Control Module Error Codes — Ice Maker Module Failure
Control module error codes indicate a failure in the ice maker’s electronic control module — the component that manages the fill, freeze, and harvest cycle timing. A power reset (unplug the refrigerator for 5 minutes) clears many temporary module errors. If the error persists and all other components (water supply, temperature, sensors) test correctly, the ice maker module itself may need replacement.
Ice maker module replacement is one of the more common ice maker repairs. On most refrigerators, the ice maker is a self-contained unit that can be replaced as a complete assembly — a process that typically takes 15–30 minutes and requires no special tools. Complete ice maker assemblies cost $50–$150 for most models and are widely available by model number.
How I Diagnosed and Fixed My Ice Maker — Step by Step
Step 1: Check the Basics Before Looking for Error Codes
After my “arm up” experience, I developed a checklist for any ice maker complaint. Before looking for error codes: confirm the ice maker is turned on (arm down or switch in the on position), confirm the freezer temperature is at or below 0°F (-18°C), confirm the water supply valve behind the refrigerator is fully open, and check when the water filter was last replaced. These four checks resolve the majority of ice maker complaints without any further diagnosis.
A year after the arm incident, my ice maker stopped producing ice again — this time with the arm in the correct position and the freezer at the right temperature. The refrigerator display showed a water supply indicator. The filter had not been replaced in 14 months.
Step 2: Replace the Water Filter
I replaced the water filter — a $35 part that took about two minutes to swap out. After the filter change, I ran three batches of ice and discarded them (standard practice after a filter change to flush the new filter). Ice production resumed normally. The water supply indicator cleared after the first successful fill cycle.
Step 3: Run a Diagnostic Test Cycle
After the filter change, I ran the ice maker’s built-in test cycle (on my model, this involves pressing and holding the test button for 3 seconds until a chime sounds). The test cycle runs a complete fill-freeze-harvest sequence and confirms that all components are functioning. Watching the test cycle — listening for the water fill, watching for the ejector arm to rotate — is the most efficient way to identify which stage of the cycle is failing.
Step 4: Monitor Production for 24 Hours
After a reset or repair, I always monitor ice production for 24 hours before concluding the issue is resolved. A normal ice maker produces 8–12 cubes per cycle and completes 6–12 cycles per day, depending on freezer temperature and water pressure. If production is significantly below this range after 24 hours, further diagnosis is needed.
Step 5: Know When to Replace the Ice Maker Assembly
If the water supply is confirmed good, the freezer temperature is correct, the sensors test within spec, and the ice maker still fails to cycle — the ice maker module has likely failed. At this point, I compare the cost of a replacement assembly ($50–$150) against the age of the refrigerator and the cost of a service call ($100–$200). For a refrigerator under 10 years old, replacing the ice maker assembly is almost always the more economical choice.
Frequently Asked Questions About Ice Maker Error Codes
What do ice maker error codes mean?
Ice maker error codes indicate a specific malfunction in the water supply, freezing, sensing, or ice production cycle. They vary significantly by brand and model — always look up the code with your specific brand and model number. Many ice maker problems do not produce a visible error code; the ice maker simply stops producing ice. Systematic troubleshooting (temperature, water supply, filter, arm position) resolves the majority of cases.
What causes an ice maker water supply error code?
The most common cause is a clogged water filter — replace it if it has been more than 6 months since the last change. Other causes include a closed or kinked water supply line, low household water pressure (below 20 psi), or a failed water inlet valve solenoid. Always replace the filter first; if the error persists, check the supply line and water pressure before testing the inlet valve.
Why is my ice maker not making ice?
Check in this order: ice maker on/off switch or arm position, freezer temperature (must be 0°F / -18°C or below), water supply valve (fully open), water filter age (replace if over 6 months old), and frozen fill tube (thaw with a hair dryer on low if frozen). If all these check out, run a test cycle to identify which stage of the fill-freeze-harvest cycle is failing.
What is an ice maker sensor error code?
A sensor error code indicates a problem with the thermistor (temperature sensor) or the ice level sensor (optical or mechanical). For optical sensors, clean the sensor lenses with a dry cloth — frost or debris can cause false “bin full” signals. For thermistor errors, test the sensor with a multimeter and compare the resistance reading to the expected value in the service manual. Both sensors are generally inexpensive to replace ($10–$30).
How do I reset my ice maker?
Press and hold the reset button on the ice maker module for 3–10 seconds until you hear a chime or the ice maker begins a test cycle. Alternatively, turn the ice maker off, wait 30 seconds, and turn it back on. For a hard reset, unplug the refrigerator for 5 minutes. After any reset, allow 24 hours for the ice maker to resume normal production before concluding the issue is resolved.
Ice Maker Repair Cost Comparison by Error Type
The table below provides estimated repair costs for common ice maker error code causes in the United States. DIY costs reflect the part only; professional costs include a typical service call and labor. Costs are indicative and vary by brand and model.
| Error Type | Common Cause | DIY Part Cost (USD) | Professional Repair Cost (USD) |
|---|---|---|---|
| Water Supply Error | Water filter replacement | $20 – $50 | $80 – $150 |
| Water Supply Error | Water inlet valve replacement | $20 – $50 | $100 – $200 |
| Freezing Error — Frozen Fill Tube | Thaw and address root cause | $0 | $80 – $150 |
| Sensor Error — Thermistor | Thermistor replacement | $10 – $30 | $100 – $200 |
| Sensor Error — Optical Ice Level | Cleaning or sensor replacement | $0 – $30 | $80 – $150 |
| Ice Maker Module Failure | Complete ice maker assembly replacement | $50 – $150 | $150 – $300 |
Note: Costs are estimates based on typical U.S. market rates as of 2024–2025. Always obtain a written estimate before authorizing repairs. Water filter replacement ($20–$50) should always be the first step for water supply errors — it is the most common cause and the least expensive fix.
Conclusion: Ice Maker Problems Are Usually Simpler Than They Appear
The two ice maker failures I experienced — an accidentally raised shutoff arm and a clogged water filter — cost me nothing and $35 respectively. Neither produced a dramatic error code. Both were resolved in minutes once I knew what to look for. That is the central lesson of ice maker error codes and solutions: the most common causes are the simplest ones, and they should always be checked first.
When an actual error code does appear, the diagnostic process follows the same pattern as other appliances: identify the fault category, start with the simplest and most accessible checks, and test components before replacing them. Water filters, thermistors, and optical sensor lenses are inexpensive and easy to address. A failed ice maker module is more expensive but still a straightforward replacement for most refrigerator models.
The one situation where ice maker repair becomes complex is when the ice maker problem is actually a refrigerator cooling problem — a freezer that is too warm due to a defrost system failure, a fan issue, or a refrigerant problem. In these cases, fixing the ice maker alone will not resolve the issue. If the freezer temperature is consistently above 10°F (-12°C), diagnose the refrigerator cooling system first.
Sources
- U.S. Department of Energy — Energy Saver: Refrigerator and Freezer Tips. Available at: energy.gov/energysaver/refrigerators
- Association of Home Appliance Manufacturers (AHAM) — Refrigerator and Ice Maker Industry Standards. Available at: www.aham.org
- NSF International — Water Filter Certification and Replacement Guidelines. Available at: www.nsf.org
- International Society of Certified Electronics Technicians (ISCET) — Appliance Service Technician Certification Standards. Available at: www.iscet.org
- Consumer Reports — Refrigerator and Ice Maker Reliability Survey, 2023. Available at: www.consumerreports.org