Quick answer: Indoor unit error codes fall into four categories — fan motor errors (E5, F5 — blower motor or speed sensor failure), temperature sensor errors (E1, E2, F1, F2 — thermistor failure), drainage errors (E4, F4 — clogged drain line or float switch trip), and communication errors (E6, F6, U8 — signal loss to outdoor unit or thermostat). A power reset, filter cleaning, and drain line clearing resolve the majority of indoor unit errors without component replacement.
The Indoor Unit That Dripped Water onto the Floor at 2 AM
The mini split in the bedroom had been running all summer without issue. Then, on a humid August night, I woke up to the sound of water dripping — the indoor unit was overflowing its drain pan onto the floor below. The display showed “E4.” I had never seen that code before and assumed the worst: a refrigerant leak, a failed pump, an expensive repair. The actual cause was a condensate drain line that had been slowly clogging with algae for months. A wet/dry vacuum applied to the drain outlet for 30 seconds cleared the blockage. The unit has run without issue since.
That experience introduced me to the most important thing about indoor unit error codes: the indoor unit is the component that homeowners interact with most directly, and its error codes are disproportionately caused by maintenance failures — dirty filters, clogged drain lines, dirty sensors — rather than component failures. This guide covers the four indoor unit error code categories, with specific troubleshooting steps for each.
What the Indoor Unit Does and Why It Generates Error Codes
The indoor unit (also called the air handler, evaporator unit, or fan coil unit) is the component of a split HVAC system that is installed inside the living space. It contains the evaporator coil (which absorbs heat from indoor air in cooling mode or releases heat in heating mode), the blower motor and wheel (which circulates air across the coil and into the ductwork or room), the air filter, the condensate drain pan and drain line (which collect and remove the water that condenses on the evaporator coil), and the control board (which manages the blower motor, monitors sensors, and communicates with the outdoor unit and thermostat).
Indoor unit error codes are generated when the control board detects a fault in any of these components or in the communication links between the indoor unit and the outdoor unit or thermostat. Because the indoor unit is in the living space and handles conditioned air, its error codes are often the first indication that something is wrong with the HVAC system — even when the underlying fault is in the outdoor unit or the refrigerant system.
The 5 Indoor Unit Error Code Categories
1. Fan Motor Errors — Blower Motor or Speed Sensor Failure
Fan motor errors indicate that the indoor blower motor is not operating at the expected speed or is not operating at all. Common codes: E5, F5, C5, or motor-specific codes depending on the brand and system type. The blower motor is the component that moves air across the evaporator coil and into the living space — without it, the coil cannot transfer heat and the system cannot condition the air.
The most common causes of fan motor errors are: a failed blower motor (the motor windings have failed — the motor does not run at all), a failed motor capacitor (on single-speed PSC motors — the capacitor provides the starting torque; a failed capacitor causes the motor to hum but not start), a blocked blower wheel (debris or ice buildup prevents the wheel from spinning freely), and a failed motor speed feedback sensor (on variable-speed ECM motors — the sensor reports motor speed to the control board; a failed sensor triggers a speed fault even if the motor is running). Check for ice on the evaporator coil and debris in the blower wheel before assuming motor failure — both are DIY-accessible checks.
2. Temperature Sensor Errors — Room Thermistor or Coil Sensor Failure
Temperature sensor errors indicate that one of the indoor unit’s thermistors has failed. The indoor unit typically has two thermistors: the room temperature sensor (reads ambient air temperature at the unit’s air intake) and the indoor coil sensor (reads evaporator coil temperature). Common codes: E1, E2, F1, F2 — the specific code indicates which sensor has failed (varies by brand).
Thermistors are NTC (negative temperature coefficient) resistors — their resistance decreases as temperature increases. A failed thermistor reads either 0Ω (short circuit) or OL (open circuit), both of which trigger an error. The room temperature sensor is typically a small cylindrical sensor clipped to the front of the unit near the air intake; the coil sensor is clipped to the evaporator coil fins. Both are accessible after removing the indoor unit’s front panel. Replacement thermistors cost $5–$20 and are available by brand and model number.
3. Drainage System Errors — Clogged Drain Line or Float Switch Trip
Drainage errors indicate that the condensate drain system is not removing water from the unit at the required rate. Common codes: E4, F4, drain error, or a dedicated drain indicator light. The condensate drain system consists of the drain pan (collects water that condenses on the evaporator coil), the drain line (carries water from the pan to a floor drain, condensate pump, or exterior), and the float switch (a safety device that shuts down the unit when water in the pan reaches a set level — preventing overflow).
⚠️ Important note: A drainage error that is not addressed promptly will result in water overflow from the drain pan — causing water damage to ceilings, walls, and flooring below the indoor unit. When a drainage error appears, turn off the unit immediately and address the drain blockage before restarting. Do not bypass or disable the float switch — it is a critical safety device that prevents water damage.
4. Communication Errors — Signal Loss to Outdoor Unit or Thermostat
Communication errors indicate that the indoor unit’s control board cannot exchange signals with the outdoor unit’s control board or with the thermostat. Common codes: E6, F6, U8, Ub, CE. The communication link between the indoor and outdoor units is a dedicated signal wire (separate from the power cables) connected to terminals labeled S, S1/S2, or COM on both units.
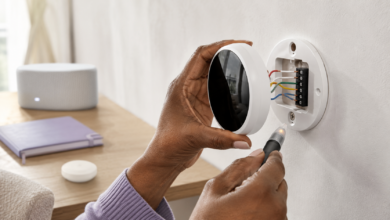
A power reset resolves many temporary communication errors caused by power fluctuations. Persistent communication errors require checking the communication cable for damage, corrosion, or loose connections at both unit terminals. If wiring is intact and the error persists, the fault is in one of the control boards — this requires professional diagnosis. Communication errors between the indoor unit and the thermostat are diagnosed by checking the thermostat wiring and performing a thermostat reset.
5. Control Board and PCB Errors — Indoor Unit Board Failure
Control board errors indicate a fault in the indoor unit’s main printed circuit board (PCB). Common codes: E1 (on some brands — indoor PCB fault), board error, or PCB error. Indoor unit PCB failures are caused by power surges, moisture ingress (from a drain overflow or high humidity), or component aging. A failed indoor unit PCB causes the unit to display persistent error codes that do not clear after a power reset, or to behave erratically — running at incorrect speeds, failing to respond to thermostat commands, or displaying multiple simultaneous error codes.
Indoor unit PCB replacement is a moderately complex repair — the board must be matched exactly to the unit’s model number, and the replacement requires careful attention to connector orientation and static discharge precautions. PCB costs range from $50–$200 depending on the brand and model. Before replacing the PCB, confirm that the error is not caused by a failed component (motor, sensor, or drain system) that is sending incorrect signals to the board.
Indoor Unit Error Code Troubleshooting: Step-by-Step
Step 1: Perform a Power Reset and Clean the Filter
Turn off the indoor unit using the remote or thermostat, then turn off the circuit breaker for the HVAC system and wait 5 minutes before restoring power. While the power is off, open the indoor unit’s front panel and remove the air filter. Wash reusable filters with warm water and mild detergent, rinse thoroughly, and allow to dry completely before reinstalling. Replace disposable filters. A dirty filter is the most common cause of airflow-related errors and contributes to coil icing, drainage problems, and motor overload. After reinstalling the filter and restoring power, observe whether the error code returns.
Step 2: Clear the Condensate Drain Line (for Drainage Errors)
For E4, F4, or drain error codes, locate the condensate drain outlet — the point where the drain line exits the building or connects to a floor drain or condensate pump. Apply a wet/dry vacuum to the drain outlet for 30–60 seconds to suction out the blockage. Alternatively, use a hand pump or compressed air (low pressure — do not exceed 30 PSI) to push the blockage through. After clearing the drain, pour a cup of water into the drain pan to confirm that water flows freely through the line. To prevent future blockages, pour a mixture of 1 cup white vinegar and 1 cup water into the drain pan monthly during the cooling season — this inhibits algae and mold growth.
Step 3: Check for Ice on the Evaporator Coil
If the indoor unit is blowing warm air, running but not cooling, or displaying a fan motor or airflow error, inspect the evaporator coil for ice buildup. Open the indoor unit’s front panel and look at the coil fins — ice appears as a white or clear coating on the fins and refrigerant tubes. If the coil is iced over, turn the unit off and set the fan to “fan only” mode (no cooling) for 1–2 hours to allow the ice to melt. Do not attempt to chip or scrape ice from the coil — this damages the aluminum fins. After defrosting, check the filter (a dirty filter is the most common cause of coil icing) and restart the unit.
Step 4: Test the Temperature Sensors (for Sensor Error Codes)
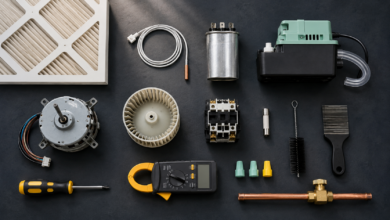
For E1, E2, F1, or F2 errors, locate the thermistors on the indoor unit’s control board. Turn off power at the circuit breaker before accessing the board. The room temperature sensor is typically clipped to the front of the unit near the air intake; the coil sensor is clipped to the evaporator coil fins. Disconnect the thermistor connector and measure resistance with a multimeter set to the 20kΩ range. At room temperature (approximately 77°F / 25°C), most indoor unit thermistors read 10kΩ–15kΩ. A reading of 0Ω or OL confirms failure. Order the replacement thermistor by brand and model number and install in reverse order of removal.
Step 5: Inspect the Communication Wiring and Call a Technician if Needed
For E6, F6, or U8 communication errors, turn off power at the circuit breaker and inspect the communication cable between the indoor and outdoor units. Check for loose terminal connections at both units, visible cable damage, and corrosion at the terminal screws. Tighten all terminal screws and clean corroded contacts with electrical contact cleaner. If wiring is intact and the error persists, contact a certified HVAC technician. Also call a technician if: the blower motor has failed (motor does not run after clearing ice and debris), the indoor unit PCB has failed, or the error involves the refrigerant system (pressure errors that display on the indoor unit but originate in the outdoor unit).
Frequently Asked Questions About Indoor Unit Error Codes
What are the most common indoor unit error codes?
The most common indoor unit error codes are temperature sensor errors (E1, E2, F1, F2 — room or coil thermistor failure), drainage errors (E4, F4 — clogged drain line or float switch trip), fan motor errors (E5, F5 — blower motor or speed sensor failure), and communication errors (E6, F6, U8 — signal loss to outdoor unit or thermostat). Codes vary by brand — always verify with your specific brand and model number.
What does an indoor unit fan motor error mean?
A fan motor error means the blower motor is not operating at the expected speed or is not running at all. Check for ice on the evaporator coil and debris in the blower wheel before assuming motor failure — both prevent the wheel from spinning freely and trigger motor errors. If the coil is clear and the wheel spins freely, the motor or its capacitor has failed. Motor replacement costs $30–$100 for the part; capacitor replacement costs $5–$20.
What does an indoor unit drainage error mean?
A drainage error means the condensate drain line is blocked or the float switch has tripped due to water accumulation in the drain pan. Turn off the unit immediately to prevent overflow. Clear the drain line with a wet/dry vacuum applied to the drain outlet. After clearing, pour water into the drain pan to confirm free flow. Add monthly vinegar treatments to prevent future algae buildup. Do not bypass the float switch — it prevents water damage.
How do I fix an indoor unit temperature sensor error?
Test the thermistor with a multimeter — disconnect the connector and measure resistance. At 77°F / 25°C, most thermistors read 10kΩ–15kΩ. A reading of 0Ω or OL confirms failure. Order the replacement by brand and model number ($5–$20). Install in reverse order of removal — the repair takes 15–20 minutes and requires only a screwdriver.
When should I call a technician for an indoor unit error code?
Call a certified HVAC technician if: the error involves refrigerant pressure (these originate in the outdoor unit but display on the indoor unit); the blower motor has failed after clearing ice and debris; the indoor unit PCB has failed; the error persists after a power reset, filter cleaning, drain clearing, and sensor testing; or the unit is making unusual noises (grinding, squealing) alongside the error code.
Indoor Unit Repair Cost by Error Code Type
The table below provides estimated repair cost ranges for the most common indoor unit error code causes in the United States. DIY costs reflect the part only; professional costs include a typical service call and labor.
| Error Code | Common Cause | DIY Part Cost (USD) | Professional Repair Cost (USD) |
|---|---|---|---|
| E1 / F1 — Room sensor error | Room temperature thermistor failure | $5 – $20 | $80 – $200 |
| E2 / F2 — Coil sensor error | Evaporator coil thermistor failure | $5 – $20 | $80 – $200 |
| E4 / F4 — Drainage error | Clogged drain line or float switch | $0 (drain clearing) | $80 – $150 |
| E5 / F5 — Fan motor error | Blower motor or capacitor failure | $5 – $100 (capacitor or motor) | $100 – $300 |
| E6 / F6 / U8 — Communication error | Communication cable or control board | $5 – $50 (cable) | $100 – $400 |
| PCB / board error | Indoor unit control board failure | $50 – $200 (board) | $150 – $450 |
| Coil icing (no error code) | Dirty filter or low refrigerant | $5 – $20 (filter) | $80 – $600+ (if refrigerant) |
Note: Costs are estimates based on typical U.S. market rates as of 2024–2025. Coil icing caused by low refrigerant (rather than a dirty filter) requires a certified HVAC technician — refrigerant handling requires EPA Section 608 certification. Always obtain a written estimate before authorizing repairs.
Conclusion: The Indoor Unit Rewards Regular Maintenance
The E4 drainage error that woke me up at 2 AM was caused by months of algae accumulation in a drain line that I had never cleaned. The fix took 30 seconds with a wet/dry vacuum. The water damage to the ceiling below — which I narrowly avoided — would have cost far more than any component repair. That experience changed how I think about indoor unit maintenance: the filter, the drain line, and the coil are the three components that require regular attention, and neglecting any of them leads directly to error codes.
Indoor unit error codes are the control board’s way of telling you that a sensor has failed, the drain is blocked, the motor is struggling, or the communication link has been lost. The diagnostic sequence is consistent: power reset and filter cleaning first, then drain clearing, then sensor testing, then motor inspection. These steps resolve the majority of indoor unit errors at minimal cost.
The errors that require professional service — refrigerant pressure faults that display on the indoor unit but originate in the outdoor unit, failed blower motors that require wiring harness access, and failed PCBs — are clearly defined. For everything else, a clean filter, a clear drain line, and a $10 thermistor will resolve most of what you encounter.
Sources
- U.S. Environmental Protection Agency (EPA) — Section 608 Refrigerant Management Regulations. Available at: www.epa.gov/section608
- Air-Conditioning, Heating, and Refrigeration Institute (AHRI) — Industry Standards for Ductless and Ducted Indoor HVAC Units. Available at: www.ahrinet.org
- North American Technician Excellence (NATE) — HVAC Indoor Unit Service Technician Certification Standards. Available at: www.natex.org
- U.S. Department of Energy (DOE) — Indoor Air Quality and HVAC System Maintenance Guidelines. Available at: www.energy.gov
- Consumer Reports — Ductless and Central Air Conditioner Reliability and Repair Cost Survey, 2023. Available at: www.consumerreports.org