Quick answer: Outdoor unit error codes fall into four categories — compressor protection errors (H6, P0, E5, E6 — technician required), refrigerant pressure errors (P1, P2 — technician required), condenser fan motor errors (E3, F3, E7 — capacitor often DIY-fixable), and electrical errors (H5, P6, U2 — inverter or power supply fault). Clean the condenser coil and perform a power reset before calling a technician. Refrigerant and compressor errors always require a certified HVAC technician.
The Outdoor Unit That Stopped Running on the Hottest Week of the Year
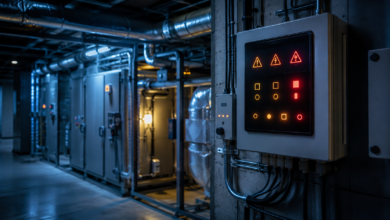
The outdoor unit of the central AC system shut down on a Tuesday afternoon in late July — the hottest week of the year. The indoor air handler was running, blowing warm air, and the thermostat showed “System Error.” I went outside and found the outdoor unit completely silent: no compressor hum, no fan spinning. The LED on the outdoor unit’s control board was blinking a high-pressure fault code. I looked at the condenser coil and found it almost completely blocked by cottonwood — the white fibrous seeds that had been accumulating for weeks. I rinsed the coil with a garden hose, performed a power reset, and the system restarted normally.
That experience taught me the most important thing about outdoor unit error codes: the outdoor unit is exposed to the elements, and many of its error codes are caused by environmental factors — blocked coils, debris in the fan, voltage fluctuations — rather than component failures. Understanding which outdoor unit errors are DIY-addressable and which require professional service is the difference between a 20-minute fix and an unnecessary service call.
What the Outdoor Unit Does and Why It Generates Error Codes
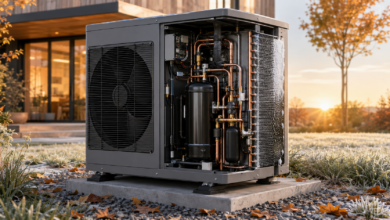
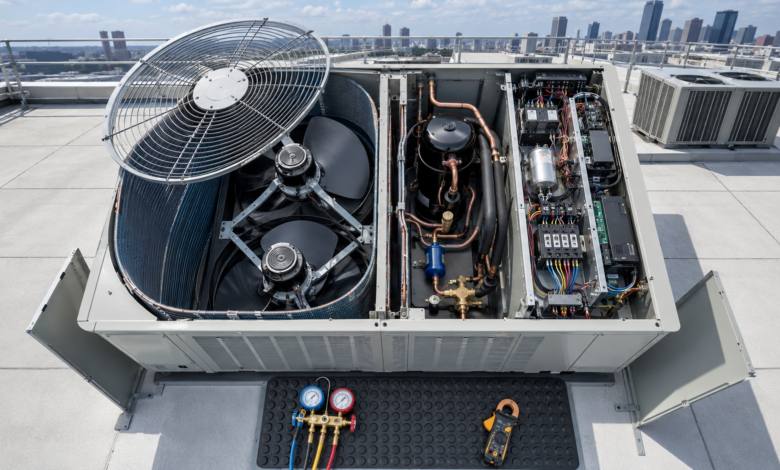
The outdoor unit (also called the condenser unit or condensing unit) contains the compressor (which pressurizes the refrigerant), the condenser coil (which releases heat from the refrigerant to the outdoor air in cooling mode, or absorbs heat from outdoor air in heating mode for heat pumps), the condenser fan motor and blade (which moves air across the condenser coil), the inverter board (on variable-speed systems — controls compressor speed), the capacitors (which provide starting torque for single-speed motors), and the outdoor unit control board (which monitors all components and communicates with the indoor unit).
Outdoor unit error codes are generated when the control board detects a fault in any of these components, or when a safety protection device — the high pressure switch, the low pressure switch, the discharge temperature sensor, or the compressor overload protector — trips to prevent equipment damage. Because the outdoor unit contains the refrigerant system and the compressor, its error codes include both DIY-addressable faults and faults that legally and practically require professional service.
The 5 Outdoor Unit Error Code Categories
1. Compressor Protection Errors — Overload, Locked Rotor, or Discharge Temperature
Compressor protection errors are the most serious outdoor unit fault category. They indicate that the compressor has shut down on a protection fault to prevent damage. Common codes: H6, P0, E5, E6, C5, OL. The compressor protection system monitors three parameters: current draw (overload protection), motor speed (locked rotor detection), and discharge temperature (the temperature of the refrigerant leaving the compressor — an indicator of refrigerant charge and compressor health).
⚠️ Critical note: Do not attempt to restart the compressor repeatedly after a protection fault. The protection system trips to prevent compressor damage — repeated restart attempts after a protection fault can cause permanent compressor failure. Perform a single power reset after addressing the most likely cause (clean the condenser coil, check supply voltage). If the protection fault recurs immediately, the compressor requires professional diagnosis. Compressor replacement is one of the most expensive HVAC repairs — on units older than 8–10 years, full system replacement is often more cost-effective.
2. Refrigerant Pressure Errors — Low Pressure and High Pressure Faults
Refrigerant pressure errors indicate that the system refrigerant pressure is outside the safe operating range. Low pressure errors (P1, E9, LP) indicate that the refrigerant charge is below the minimum operating pressure — caused by a refrigerant leak or an undercharged system. High pressure errors (P2, E8, HP) indicate that refrigerant pressure has exceeded the maximum safe limit — caused by a blocked condenser coil, a failed condenser fan, refrigerant overcharge, or a failed expansion valve.
⚠️ Critical safety and legal note: All refrigerant pressure errors require a certified HVAC technician. In the United States, handling refrigerants without EPA Section 608 certification is a federal violation carrying fines up to $44,539 per day. Modern systems use R-410A, R-32, or R-290 refrigerants — R-32 and R-290 are mildly flammable and require additional handling precautions. For high pressure errors specifically, check the condenser coil for debris blockage before calling a technician — a blocked coil is a DIY-accessible fix that may resolve the high pressure fault without a service call.
3. Condenser Fan Motor Errors — Fan Not Running or Running at Incorrect Speed
Condenser fan motor errors indicate that the outdoor fan — which moves air across the condenser coil to dissipate heat — is not operating correctly. Common codes: E3, F3, E7, fan error. Without the condenser fan, the condenser coil cannot release heat to the outdoor air, causing refrigerant pressure to rise rapidly and triggering a high pressure protection shutdown.
The most common causes of condenser fan motor errors are: a failed run capacitor (the capacitor that keeps the single-speed fan motor running — a failed capacitor causes the motor to start briefly and then stop, or not start at all), a failed fan motor (the motor windings have failed), a seized fan blade (debris has jammed the blade), and a failed motor speed feedback sensor (on variable-speed systems). The run capacitor is the most common cause and the most DIY-accessible fix — capacitors cost $5–$20 and can be replaced with basic tools after discharging the old capacitor safely.
4. Electrical and Inverter Errors — Inverter Board, Capacitor, or Power Supply Fault
Electrical errors indicate a fault in the outdoor unit’s electrical components. Common codes: H5, P6, Pd, U2 (inverter board or IPM module fault), U0 (low voltage fault), U2 (power supply voltage fault). Inverter errors are specific to variable-speed systems and indicate a fault in the inverter board that controls compressor speed. Power supply errors indicate that the supply voltage to the outdoor unit is outside the acceptable range (typically ±10% of rated voltage).
Before assuming inverter board failure, check the supply voltage at the outdoor unit’s disconnect box with a multimeter. Sustained undervoltage (below 90% of rated voltage) or overvoltage (above 110%) causes inverter board failures and will damage replacement boards if the voltage issue is not corrected first. Inverter board replacement costs $80–$300 for the part and is technically DIY-accessible but requires careful attention to static discharge precautions and correct board orientation.
5. Communication and Outdoor Sensor Errors — Signal Loss or Sensor Failure
Communication errors indicate that the outdoor unit’s control board cannot exchange signals with the indoor unit’s control board. Common codes: E6, F6, U8, U4. Outdoor sensor errors indicate that the outdoor ambient temperature sensor or the outdoor coil sensor has failed. Common codes: E3, F3 (outdoor temperature sensor), E4 (outdoor coil sensor — on some brands).
Communication errors are diagnosed by checking the communication cable between the indoor and outdoor units — a power reset resolves many temporary communication errors. Outdoor sensor errors are diagnosed by testing the thermistor with a multimeter and comparing the reading against the resistance-temperature table in the service manual. Outdoor thermistors cost $10–$30 and are accessible after removing the outdoor unit’s service panel (with power off at the disconnect box).
Outdoor Unit Error Code Troubleshooting: Step-by-Step
Step 1: Perform a Power Reset at the Disconnect Box
Locate the outdoor unit’s disconnect box — a weatherproof electrical box mounted on the wall near the outdoor unit, typically within 3 feet of the unit. Open the box and pull out the disconnect block (a cartridge that interrupts power to the outdoor unit) or turn off the disconnect switch. Wait 5 minutes, then restore power. For central HVAC systems, also turn off the indoor air handler’s circuit breaker and restore it after the outdoor unit reset. Wait 10 minutes before calling for cooling or heating — the compressor requires a pressure equalization period before restarting. If the error code returns within minutes of the reset, the underlying fault has not been resolved.
Step 2: Clean the Condenser Coil
Turn off power at the outdoor unit’s disconnect box before cleaning the coil. Inspect the condenser coil fins on all sides of the outdoor unit for debris — leaves, grass clippings, cottonwood, and dirt accumulate on the coil fins and restrict airflow. Use a garden hose to rinse the coil from the inside out (spray from inside the unit outward through the coil fins — not from outside in, which pushes debris deeper into the fins). For heavy buildup, use a commercial coil cleaner spray (available at HVAC supply stores) — apply, allow to foam for 5 minutes, then rinse. Ensure the outdoor unit has at least 18–24 inches of clearance on all sides and is not surrounded by vegetation. Restore power and observe whether the error recurs.
Step 3: Check the Condenser Fan (for Fan Motor Errors)
With power off at the disconnect box, check the condenser fan blade by hand — spin it gently to confirm it rotates freely without binding. If the blade is seized by debris, clear the obstruction. If the blade spins freely but the motor does not run when power is restored, the run capacitor is the most likely cause. The run capacitor is a cylindrical or oval component mounted inside the outdoor unit’s electrical compartment (the metal panel on the side of the unit). Before touching the capacitor, discharge it by placing a screwdriver blade across both terminals — capacitors store charge even after power is removed. A failed capacitor is visually identifiable by a bulged or leaking top. Replace with a capacitor of the same microfarad (µF) rating and voltage rating — these are printed on the capacitor label.
Step 4: Check the Supply Voltage (for Inverter and Electrical Errors)
For H5, P6, U2, or power supply error codes, check the supply voltage at the outdoor unit’s disconnect box with a multimeter set to AC voltage. With power on and the unit running (or attempting to run), measure voltage between the two hot terminals in the disconnect box. For a 240V system, the reading should be 216V–264V (±10% of 240V). For a 208V system, the reading should be 187V–229V. A reading consistently below the minimum indicates a utility supply issue or an undersized service wire — contact your utility company or a licensed electrician. Do not replace the inverter board until the supply voltage is confirmed to be within specification.
Step 5: Call a Technician for Refrigerant, Compressor, and Persistent Errors
Contact a certified HVAC technician if: the error involves refrigerant pressure (P1, P2, LP, HP); the compressor protection fault recurs after a power reset and condenser cleaning; the condenser fan motor has failed (not just the capacitor); the inverter board has failed after confirming correct supply voltage; or the error persists after cleaning the condenser coil and performing a power reset. Provide the brand name, model number of both the indoor and outdoor units, and the exact error code. For refrigerant errors, confirm EPA Section 608 certification before authorizing work.
Frequently Asked Questions About Outdoor Unit Error Codes
What are the most common outdoor unit error codes?
The most common outdoor unit error codes are refrigerant pressure errors (P1 low pressure, P2 high pressure — refrigerant system issues requiring a technician), compressor protection errors (H6, P0, E5, E6 — overload or locked rotor), condenser fan motor errors (E3, F3, E7 — often a failed capacitor), and inverter errors (H5, P6, U2 — inverter board or power supply fault). Codes vary by brand — always verify with your specific brand and model number.
What does a compressor error mean on an outdoor unit?
A compressor error means the compressor has shut down on a protection fault — overload (excessive current), locked rotor (motor cannot start), or discharge temperature (compressor outlet too hot). Do not restart repeatedly after a protection fault. Clean the condenser coil, check supply voltage, and perform a single power reset. If the fault recurs, contact a certified HVAC technician. Compressor replacement on units older than 8–10 years often approaches the cost of a new system.
What does a high pressure error mean on an outdoor unit?
A high pressure error (P2, E8, HP) means refrigerant pressure on the high side has exceeded the safe limit. The most common DIY-addressable cause is a blocked condenser coil — clean with a garden hose from inside out. Also check that the condenser fan is running. If the coil is clean and the fan is running, the cause is refrigerant overcharge or a failed expansion valve — both require a certified HVAC technician.
Can I fix an outdoor unit error code myself?
Yes — for condenser coil blockage (high pressure errors), condenser fan capacitor failure (fan motor errors), outdoor sensor failure (thermistor replacement), and temporary communication errors (power reset), DIY repair is feasible. For refrigerant pressure errors (P1, P2), compressor errors (H6, P0), and inverter board failures, professional service is required. Refrigerant handling without EPA Section 608 certification is a federal violation.
When should I call a technician for an outdoor unit error code?
Call a certified HVAC technician if: the error involves refrigerant pressure (P1, P2, LP, HP); the compressor protection fault recurs after a power reset and coil cleaning; the condenser fan motor has failed (not just the capacitor); the inverter board has failed after confirming correct supply voltage; or the error persists after cleaning the condenser coil and performing a power reset. For refrigerant errors, EPA Section 608 certification is legally required.
Outdoor Unit Repair Cost by Error Code Type
The table below provides estimated repair cost ranges for the most common outdoor unit error code causes in the United States. DIY costs reflect the part only; professional costs include a typical service call and labor. Refrigerant and compressor repairs are professional-only.
| Error Code | Common Cause | DIY Part Cost (USD) | Professional Repair Cost (USD) |
|---|---|---|---|
| E3 / F3 — Outdoor sensor error | Outdoor temperature thermistor failure | $10 – $30 | $100 – $250 |
| Fan motor error (E7, F3) | Run capacitor failure | $5 – $20 (capacitor) | $80 – $200 |
| Fan motor error (motor failed) | Condenser fan motor failure | $30 – $100 (motor) | $150 – $350 |
| E6 / F6 / U8 — Communication error | Communication cable or control board | $5 – $50 (cable) | $100 – $400 |
| H5 / P6 / U2 — Inverter error | Inverter board or IPM module failure | $80 – $300 (board) | $200 – $600 |
| P1 / E9 — Low refrigerant pressure | Refrigerant leak or undercharge | Not applicable | $200 – $800+ |
| P2 / E8 — High refrigerant pressure | Blocked coil, failed fan, or overcharge | $0 (coil cleaning) | $100 – $500 |
| H6 / P0 — Compressor protection | Compressor overload or locked rotor | $15 – $50 (start capacitor) | $300 – $2,000+ |
Note: Costs are estimates based on typical U.S. market rates as of 2024–2025. Compressor replacement on a central HVAC system ($1,500–$2,500+ installed) often approaches the cost of a new system — for units older than 8–10 years with a compressor error, full system replacement is frequently more cost-effective. Always obtain a written estimate before authorizing repairs. Refrigerant handling requires EPA Section 608 certification.
Conclusion: The Outdoor Unit Needs Seasonal Attention
The high pressure fault that shut down my outdoor unit on the hottest week of the year was caused by cottonwood that had been accumulating on the condenser coil for weeks. A 10-minute rinse with a garden hose resolved it. That outcome — an environmental maintenance failure causing a protection shutdown — is the most common outdoor unit error code scenario that homeowners can address themselves.
Outdoor unit error codes divide into two clear groups: errors caused by environmental factors and maintenance failures (blocked condenser coil, failed capacitor, debris in the fan, voltage fluctuations) that are DIY-addressable, and errors caused by refrigerant system faults and compressor failures that require a certified HVAC technician. The first group is addressed by cleaning the coil, checking the fan, replacing the capacitor, and verifying supply voltage. The second group is non-negotiable — refrigerant handling is federally regulated, and compressor diagnosis requires specialized equipment.
Clean the condenser coil at least once per season — more frequently in areas with cottonwood, heavy pollen, or nearby vegetation. Ensure 18–24 inches of clearance around the unit. Check the condenser fan blade for debris after storms. These three maintenance steps prevent the majority of outdoor unit error codes that homeowners encounter.
Sources
- U.S. Environmental Protection Agency (EPA) — Section 608 Refrigerant Management Regulations. Available at: www.epa.gov/section608
- Air-Conditioning, Heating, and Refrigeration Institute (AHRI) — Industry Standards for Outdoor Condensing Units and Heat Pumps. Available at: www.ahrinet.org
- North American Technician Excellence (NATE) — HVAC Outdoor Unit Service Technician Certification Standards. Available at: www.natex.org
- U.S. Department of Energy (DOE) — Central Air Conditioner and Heat Pump Efficiency Standards and Maintenance Guidelines. Available at: www.energy.gov
- Consumer Reports — Central Air Conditioner and Heat Pump Reliability and Repair Cost Survey, 2023. Available at: www.consumerreports.org